

About
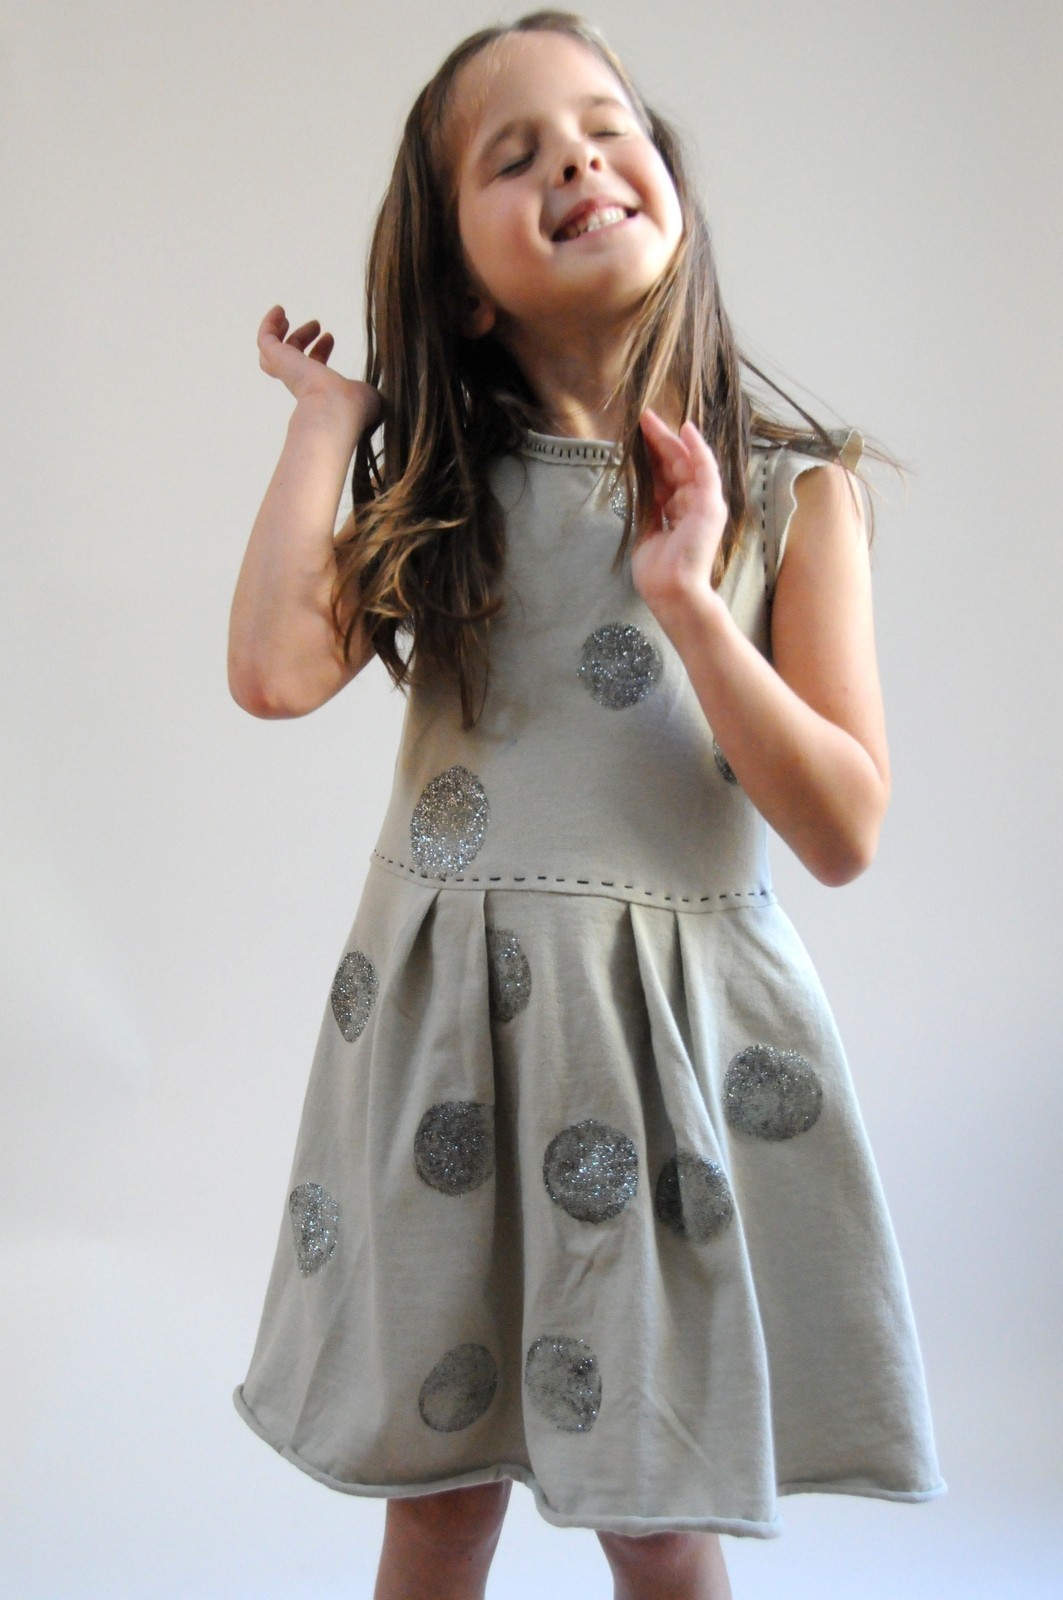
Design and embellish a simple jersey dress with glitter paint for celestial results.
Oh this is a fun project! My dress was prompted by the perfect timing of day one of the Kids Clothes Week Challenge and several remarkable glitter craft paints I received from Martha Stewart Crafts in conjunction with Michaels Craft Month. I constructed a cap sleeve t-shirt dress on a simple neutral-toned cotton jersey and casually placed glittery circles of varying degrees of visual density using Martha's foam pouncers to apply the paint. The effect of the very dense Martha Stewart Multi-Surface Glitter Craft Paint (Obsidian tone) was dazzling. Before the paint was dry, my daughter declared this her most favorite thing in the world and asked for several more just like it.
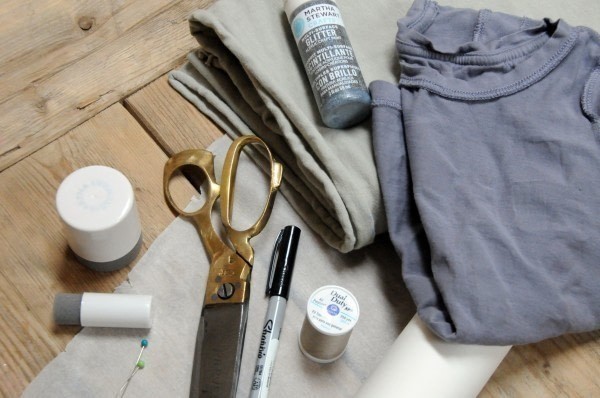
To create a similar dress: gather a yard or so of cotton Jersey (less if you’re making something smaller than would fit a five year old girl), a favorite well-sized t-shirt to use for your pattern base, parchment or tracing paper, general sewing bits and bobs as well as Martha Stewart’s multi-surface glitter craft paint and pouncers to add the sparkle. Due to the stretchy nature of knit no closure methods are required to finish the project.
-
 Luis G. favorited Celestial Dress Diy
14 Oct 06:56
Luis G. favorited Celestial Dress Diy
14 Oct 06:56
-
 james w. favorited Celestial Dress Diy
06 Aug 04:48
james w. favorited Celestial Dress Diy
06 Aug 04:48
-
 Pimke added Celestial Dress Diy to Nähmuster
01 Feb 09:58
Pimke added Celestial Dress Diy to Nähmuster
01 Feb 09:58
-
 KiyoeLunet favorited Celestial Dress Diy
05 Jun 07:44
KiyoeLunet favorited Celestial Dress Diy
05 Jun 07:44
-
 Zombie Babe favorited Celestial Dress Diy
06 Sep 06:42
Zombie Babe favorited Celestial Dress Diy
06 Sep 06:42
-
 ale_corason favorited Celestial Dress Diy
06 Sep 06:40
ale_corason favorited Celestial Dress Diy
06 Sep 06:40
-
 Step 1
Gather your supplies
-
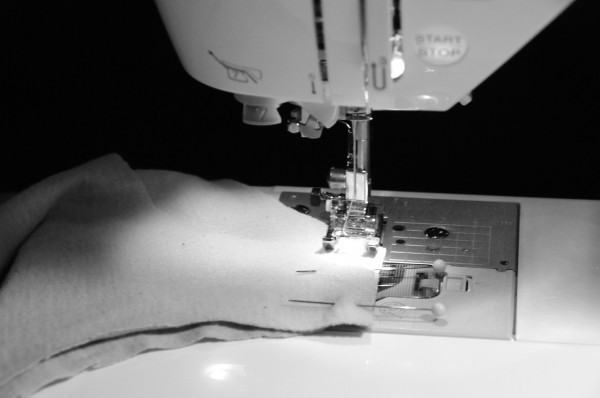
 Step 2
Note: half inch seam allowance; stretchy zigzag stitch
Turn a well-loved flattering T-shirt inside out and trace the front (pattern piece 1) and back (pattern piece 2) sides of the shirt at the edges of the interior seam allowances. Add about 3/8″ to each of the seam allowances to give some room to grow/shrink. If your tee-shirt does not have a cap sleeve, you can create one (pattern piece 3) by narrowing the lower portion of the sleeve toward the armpit region. Do not add seam allowance to the outer edge of the cap sleeve, you will leave this area raw. Fold the pattern piece in half to make sure the lines are similar and symmetrical. Smooth out rough edges and confirm that the front and back pieces line up.
-
 Step 3
Cut out front, back, two sleeves and a 1.33″ wide x 18″ long neckband pieces.
-
Step 4
Determine a high natural waist point and trim the lower portion of the front and back shirt pieces to half an inch longer than that measurement (using an existing dress as a visual aid will help you create a flattering garment). Cut a 44″ wide skirt panel measuring the distance between wearers waist and where you would like the skirt to hit. No hem will be sewn at the bottom, but you should have half an inch seam allowance at the waist. *44″ wide will allow for big pleating, if you don’t think you’ll like so much pleating you can cut a much more narrow skirt panel, even a simple a-line skirt would be fantastic. (Skip ahead to step 13 if you would like to pre-paint the dress prior to sewing, air dry prior to sewing and pick up at step 4 later.)
-
 Step 5
With shirt fabric right sides together, sew shoulder seams.
-
 Step 6
Sew cap sleeves- right sides together – to the right side of the material, push seam allowances away from sleeve and toward the body of the shirt, you will hand sew this flat (felled) seam later.
-
Step 7
Sew the two side-seams of the shirt and leave the lower edge raw.
-
 Step 8
With right sides together sew a tube from the skirt panel. Push seam allowance to one side.
-
Step 9
Mark midpoint on front, and quarter points both sides of the tube (the back mid-point is marked by seam allowance) with pins or chalk.
-
Step 10
Turn the t-shirt right side out. Mark the midpoint on the front and back of the shirt with a straight pin or chalk.
-
 Step 11
Turn the tube right side out and lie flat with the rear seam centered below, place just under the t-shirt top so you can visually consider where the pleats will hit. Begin making the pleating by folding toward the center. My four front pleats are folded toward the middle of the skirt, but with about 3-4 inches of no pleating in the center front. Use the side pins (or chalk marks) to visually aid the alignment of top bodice to skirt. Flip pieces over and create the back pleats – pin all pleats to secure.
-
Step 12
At the top of the skirt, sew each pleat in place with a 3/8″ seam allowance.
Then turn the skirt right side out and secure the skirt top to the shirt bottom with pins. Sew in place.
-
Step 13
Fold the neckband in half, wrong sides together, starting at the center back neck pin to the dress neckline and overlap by an inch. Sew with an elastic embroidery stitch, I used a parallel whipstitch.
-
Step 14
Hand embroider or use a simple running stitch to flatten the seam allowance and add visual interest to the piece, I used a simple running stitch at the waistband and down the rear skirt seam as well as at the sleeves to secure the seam allowances flat.
-
 Step 15
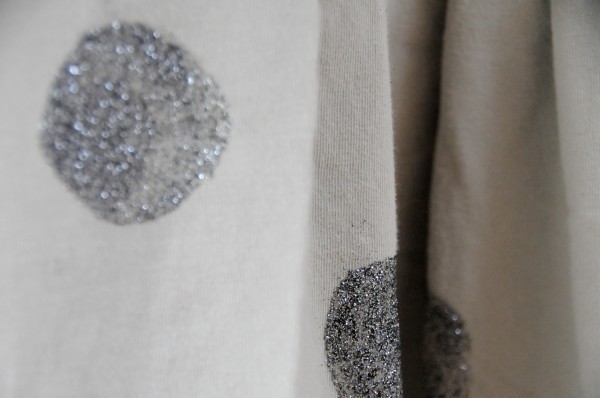
Finally, the fun part (unless you skipped ahead). Embellish the dress with Martha Stewarts amazing permanent all-surface craft paint, use the Foam Pouncers to create perfect circles. It may be easier to do the front – allow the dress to dry and then do the back side. Be sure to clean up before the paint dries. I found stray glitter bits will wipe away with a wet paper towel, even when dry.
-
 Step 16
I’d let the dress cure for a day or two before washing.