


About
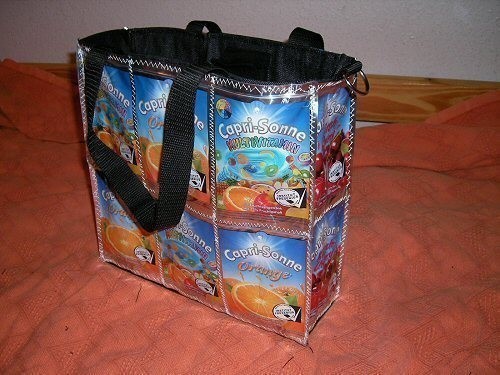
Capri Sun Bag
My first step by step project... please excuse my bad English, I hope everything will be understandable ^^
I made this bag of Capri Sonne (German Capri Sun ;) ) packages. My bag has a little inside pocket, but I can't really describe how I made it.
-
 Key West Witch favorited Capri Sun Bag
12 May 18:25
Key West Witch favorited Capri Sun Bag
12 May 18:25
-
 Bonnie P. favorited Capri Sun Bag
09 Mar 04:51
Bonnie P. favorited Capri Sun Bag
09 Mar 04:51
-
 Melissa Beth favorited Capri Sun Bag
16 Feb 05:41
Melissa Beth favorited Capri Sun Bag
16 Feb 05:41
-
 cokerewardsfan favorited Capri Sun Bag
23 Mar 00:44
cokerewardsfan favorited Capri Sun Bag
23 Mar 00:44
-
 Haliej added Capri Sun Bag to Bags
01 Aug 13:14
Haliej added Capri Sun Bag to Bags
01 Aug 13:14
-
 susisorglos added Capri Sun Bag to Taschen nähen
26 Apr 20:10
susisorglos added Capri Sun Bag to Taschen nähen
26 Apr 20:10
-
 tyler s. favorited Capri Sun Bag
27 Jan 17:39
tyler s. favorited Capri Sun Bag
27 Jan 17:39
-
 Tamiko B. added Capri Sun Bag to capri sun
24 Dec 00:32
Tamiko B. added Capri Sun Bag to capri sun
24 Dec 00:32
-
 christa.salmon added Capri Sun Bag to Craft fair
27 Oct 22:14
christa.salmon added Capri Sun Bag to Craft fair
27 Oct 22:14
-
 darlene.mickey.9 favorited Capri Sun Bag
08 Jul 02:34
darlene.mickey.9 favorited Capri Sun Bag
08 Jul 02:34
-
 Step 1
That's what I used for my bag ^^
-
 Step 2
Decide how many packets you want to use and how to sort them. As you can see in the picture of the finished bag I used 6 for the front/back and 2 for the sides.
-
 Step 3
Put the first two packages next to each other, overlapping just a tiny bit. Fix with adhesive tape (from the back)
-
 Step 4
Stitch the packages together, using a denim needle. The sewing machines might have problems transporting the packages, maybe it will also skip some stitches.
You can use wide zigzag stitch or straight stitch, depending on personal taste ^^ -
 Step 5
For the front and back side just make two rows of three packages and glue/stitch those together afterwards.
-
 Step 6
Make the rest of the sides the same way.
-
 Step 7
Cut the base out of the denim. You might want to double the fabric for this to make it sturdier.
Use the width of the front and side panel as measures.
Remember to add seam allowances! -
 Step 8
Cut the lining out of the denim, just use the capri sun pieces as patterns. Don't forget to add another base piece.
Remember to add seam allowances! -
 Step 9
Sew the first capri sun piece to the base, left side on right side. As you can see, capri sun packages on fabric is even trickier than just sewing capri sun packages...
-
 Step 10
Sew the remaining capri sun pieces to the base.
-
 Step 11
Stitch the capri sun pieces together, left side on left side. This means the seams will show on the right side, which looks pretty cool in my opinion.
-
 Step 12
A picture of how I made the inside pocket, maybe it will help to make your own... I just don't know how to explain that Oo
-
 Step 13
Inside pocket again, sewn on one of the lining pieces.
-
 Step 14
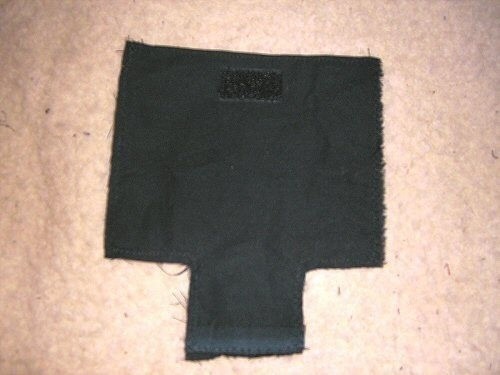
The... erm... flap(?) to close the inside pocket.
-
 Step 15
... and the finished inside pocket.
-
 Step 16
Sew the sides of the lining. You might want to leave one side open to make adding the base piece easier. I forgot that xD
-
 Step 17
Add the base.
-
 Step 18
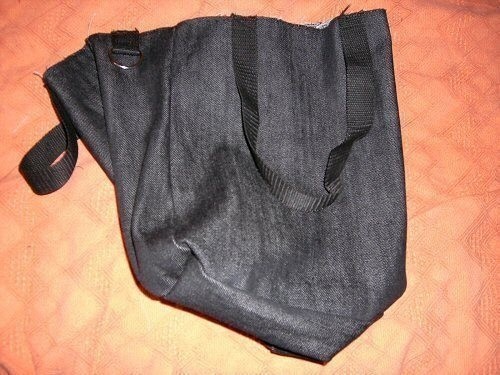
Add the straps to the lining, facing the obviously wrong way. The top edge of the lining will be turned down in the next step, so the straps will show the right way up ^^
In this step you can use a piece of strap material to add the d-ring, too. -
 Step 19
Turn the top edge down (about 1cm, maybe a bit more), out the lining into the bag and stitch the top edge.
Congrats, your bag is finished =)


But Hella cute idea!
But Hella cute idea!