About
Canvas Greeting Card
Making custom canvas greeting cards is one of my favorite projects! I truly enjoy creating them because these artsy canvas cards are gifts themselves and it shows the person that you are creating the card for that you have truly put in a lot of effort in creating something just for them!
You can add a message inside, a poem, song lyrics....just about anything!
I used a painting that I had on hand in my studio as the front and back design of the card.
Tags
-
 Emma H. favorited Canvas Greeting Card
13 Apr 17:29
Emma H. favorited Canvas Greeting Card
13 Apr 17:29
-
 Jennifer McCully published her project Canvas Greeting Card
08 Apr 09:00
Jennifer McCully published her project Canvas Greeting Card
08 Apr 09:00
-
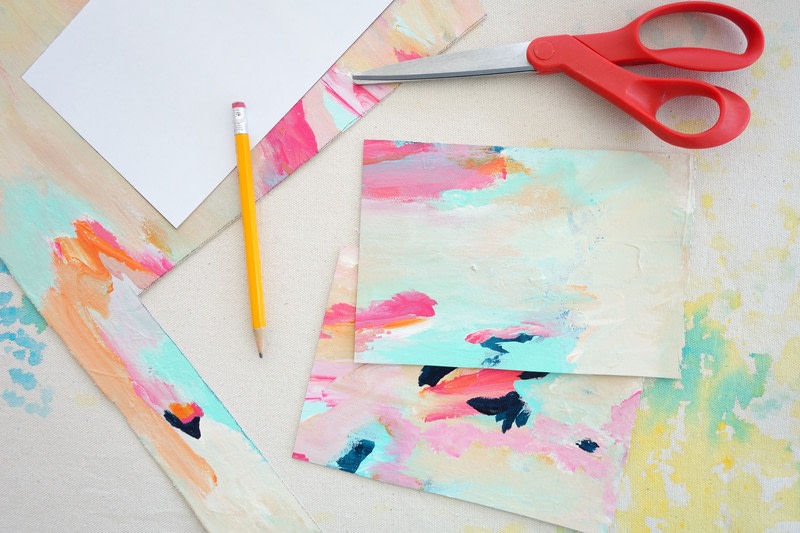
 Step 1
Using an old abstract painting from studio, I removed it from the wood frame that it was on and I cut out two 4.75 x 7 inch rectangles focusing on the areas of the painting that I liked the most.
-
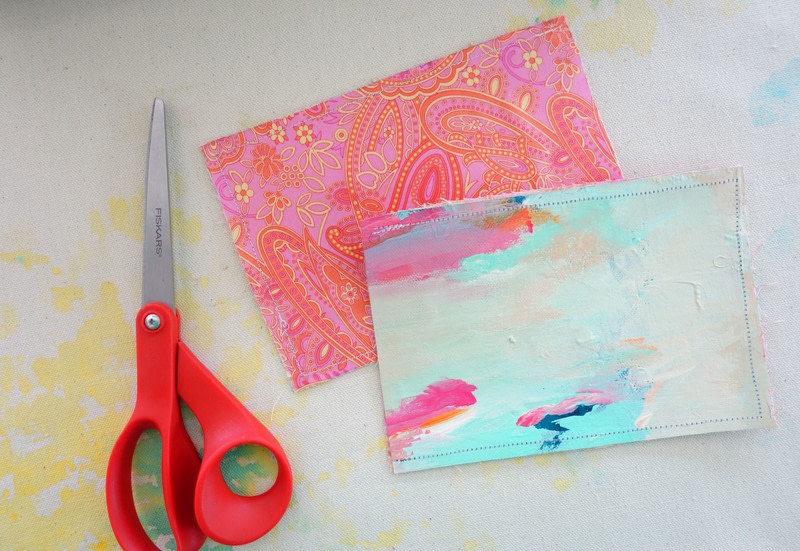
 Step 2
I searched through my scrap fabric pile and found some fabric to match the colors/artwork of the painting.
Now you should have the following:
1. Two rectangles of canvas artwork for use as the front and back of the greeting card.
2. Two rectangles (same exact size as the painting rectangles) of fabric for use as the inside covers (both front and back) of the greeting card.
There are several ways you can adhere these layers together.
1. You can fuse the layers together, the front of the card (the painting on canvas) and the inside cover of the card (the scrap fabric) - and the back of the card (canvas) with the inside back of the card (fabric). After fusing them together you can either combine the front and back of the card together with a sewing machine or you can hand sew them.
ALTERNATE ROUTE:
If you are not into sewing, you can use Fabric Glue to glue the layers together and then make three holes in the sides (kind of like a notebook) and use decorative scrapbooking brads to hold the front and back of the card in place. You will need grommet pliers to make the hole punches before adding the grommets as the layers of canvas and fabric together can be pretty thick.
No need to combine all of the layers just yet, but going through all of the options in this step will allow you to make whatever choices you need to before going forward.
For this project, I fused the two layers together to make the front and back of the greeting card, and then used a sewing machine to sew the rectangles together.
On a side note - it is not 100% necessary for you to use a fabric liner for the inside cover of your greeting card. If you wish to simply leave the canvas natural, you can do that too! I just like to add the fabric because it adds a little something extra to the card.
-
 Step 3
While the front and the back of the card are still separated, I drew with a pencil the greeting on the front cover. I printed out a font style that I liked from my computer and tried to copy the font type as best as I could on the front of the greeting card.
-
 Step 4
After drawing the words in pencil, I used a very small paint bottle with a fine tip added to it to paint over my pencil lines. When the paint was COMPLETELY dry, I erased any pencil lines that could still be seen.
-
 Step 5
I am now ready to bring all of the layers together to make the greeting card come to life!
The photo shows the inside of the card...and it is sewn together on the left side there, all three layers - the front of the card, the paper greeting/message and the back of the card.
From my computer, I printed out a inside greeting on thicker paper. I cut it out to be the same size as the front and back card covers and placed it (sandwiched it) between the front and back of the card. I then, sewed ALL THREE LAYERS together on one end only so that you can open up the card like a book.
This is where the brads come in! If you choose not to sew all three layers together, you can put 3 holes on the left side of the rectangles (just make sure that the holes line up on all three pieces) and you can use 3 decorative brads to hold the layers in place.
Sewing all of the layers together OR using 3 decorative brads to hold all of the layers together works! Simply choose what is easiest for you!
-
 Step 6
The final front of the card.... You can see the stitching all the way around the front cover. The back cover has the same exact stitching lines around it as well.