


About
Learn expert way to collect for free!
Firstly, id like say that im an AMATEUR Bug Collector. Most this stuff i learned from books or internet, & adjusted it to my cheap budget. You can do some research of your own, for better quality job...but it works for me. ;)
I have a deep love & fascination for bugs, & i use them as inspiration/reference in my artwork. So collecting them seemed natural to me. Bug Collecting has been a popular hobby since Victorian times.
.
I'll try to answer any questions/problems you have. THIS PROJECT FOR ADULTS ONLY!! (Bc of difficulty & use of chemicals!)
***IF U DONT 'AGREE' WITH THIS PROJECT, ID APPRECIATE IT IF U DONT COMMENT. & READ MY PREVIOUS COMMENTS BEFOREHAND. THIS IS FOR PEOPLE WHO LIKE IT & WANT TO LEARN. THANK YOU***
Tags
-
 Barbara M. favorited Bug Collecting/Pinning
23 Jan 10:31
Barbara M. favorited Bug Collecting/Pinning
23 Jan 10:31
-
 Mariah K. favorited Bug Collecting/Pinning
27 Jul 20:52
Mariah K. favorited Bug Collecting/Pinning
27 Jul 20:52
-
 DarkAshHurts replied to a comment on her project Bug Collecting/Pinning
28 Sep 09:13
DarkAshHurts replied to a comment on her project Bug Collecting/Pinning
28 Sep 09:13
- Dianna Reed favorited Bug Collecting/Pinning 26 Sep 14:49
- Dianna Reed added Bug Collecting/Pinning to tings to be done! 26 Sep 14:47
- Dianna Reed commented on Bug Collecting/Pinning 26 Sep 14:47
-
 Hella commented on Bug Collecting/Pinning
25 Aug 11:46
Hella commented on Bug Collecting/Pinning
25 Aug 11:46
-
 Raven Beauty favorited Bug Collecting/Pinning
20 Aug 11:39
Raven Beauty favorited Bug Collecting/Pinning
20 Aug 11:39
-
Raven Beauty commented on Bug Collecting/Pinning
20 Aug 11:38
-
 Corvii favorited Bug Collecting/Pinning
28 May 23:28
Corvii favorited Bug Collecting/Pinning
28 May 23:28
You Will Need
-
 Step 1
To Collect bugs you need:
+ a "Killing Jar" (to safely kill insects)
+ a "Spreading Board" (to spread wings & pin them)
+ a Display Box (to display them)
.
Im going to show you how to do all this, SO simply & for free!!! With stuff from around your house! :D -
 Step 2
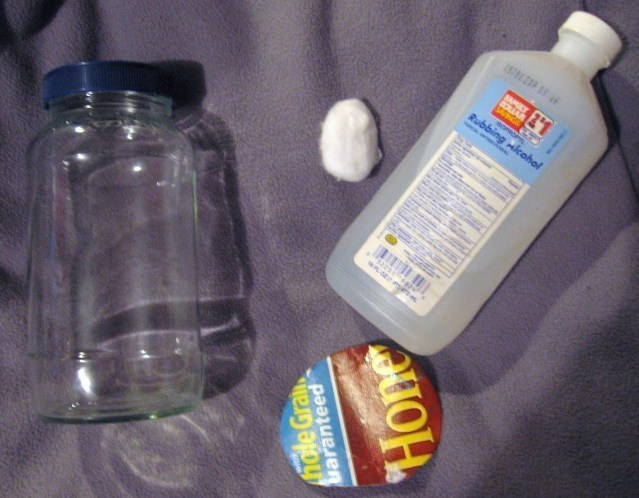
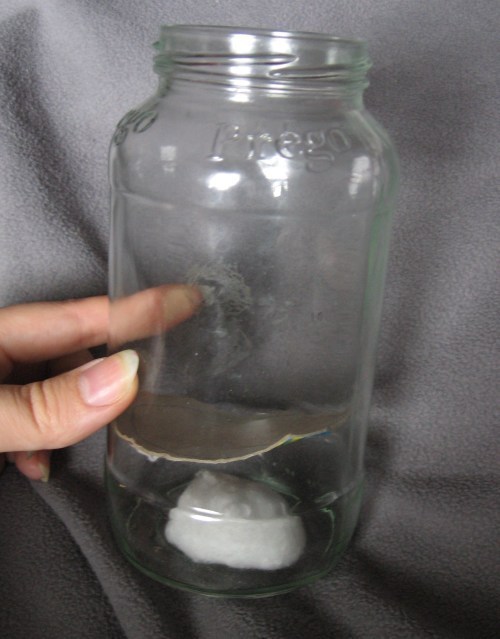
First you make a "Killing Jar" to expire the insect.
.
You will need: Glass Jar with tight lid (mines an old spagetti sauce jar), cottonball, rubbing alcohol, cardboard (mines a cereal box). -
 Step 3
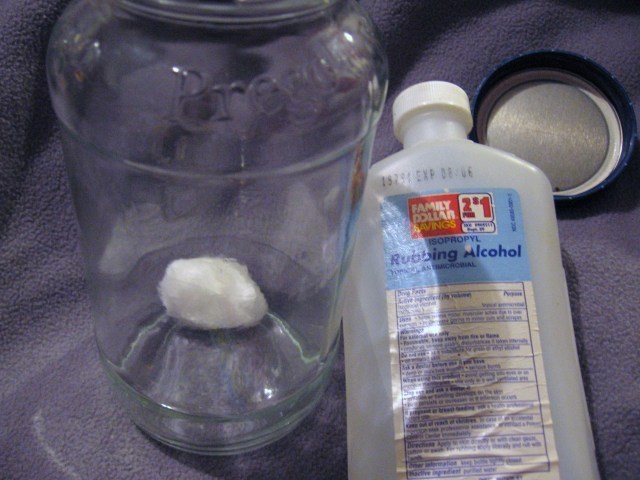
Dab a cottonball with 'rubbing alcohol', & place it in the jar.
.
** The alcohol is your 'killing agent'. It will paralyze & eventually kill the insect. There are harsher, more effective chemicals you can use, but theyre harder to find. These chemicals are: ethyl-acetate, cyanide, or tetrachloride
NEVER USE WITHOUT AN ADULT, & AWAY FROM PETS! -
 Step 4
Next, cut a round piece of cardboard, about the same circumference as the inside of the jar ....Place it inside the jar, on top of the cottonball.
.
**This keeps the bug from touching the wet chemical which can damage or discolor it.** -
 Step 5
Go outside & Catch A Bug!!! This is the funnest part!
.
I recommend using a net, or you can damage the bug. Especially butterflies/moths, whos wings lose color "scales" from contact.
*Cheap Way: Use a old fish-aquarium net, like i do! ...HEY It Works! -
 Step 6
Place bug inside the Killing Jar, & close lid tightly.
Set it aside & come back in hour or more.
.
**The alcohol will eventually kill the poor bug. (faster, if u use a harsher chemical)
Say your sorry, pray, cry ...if it makes u feel better. lol -
 Step 7
**Within 3 days you HAVE to spread/pin the bug while its soft.**
.
Spreading/Pinning:
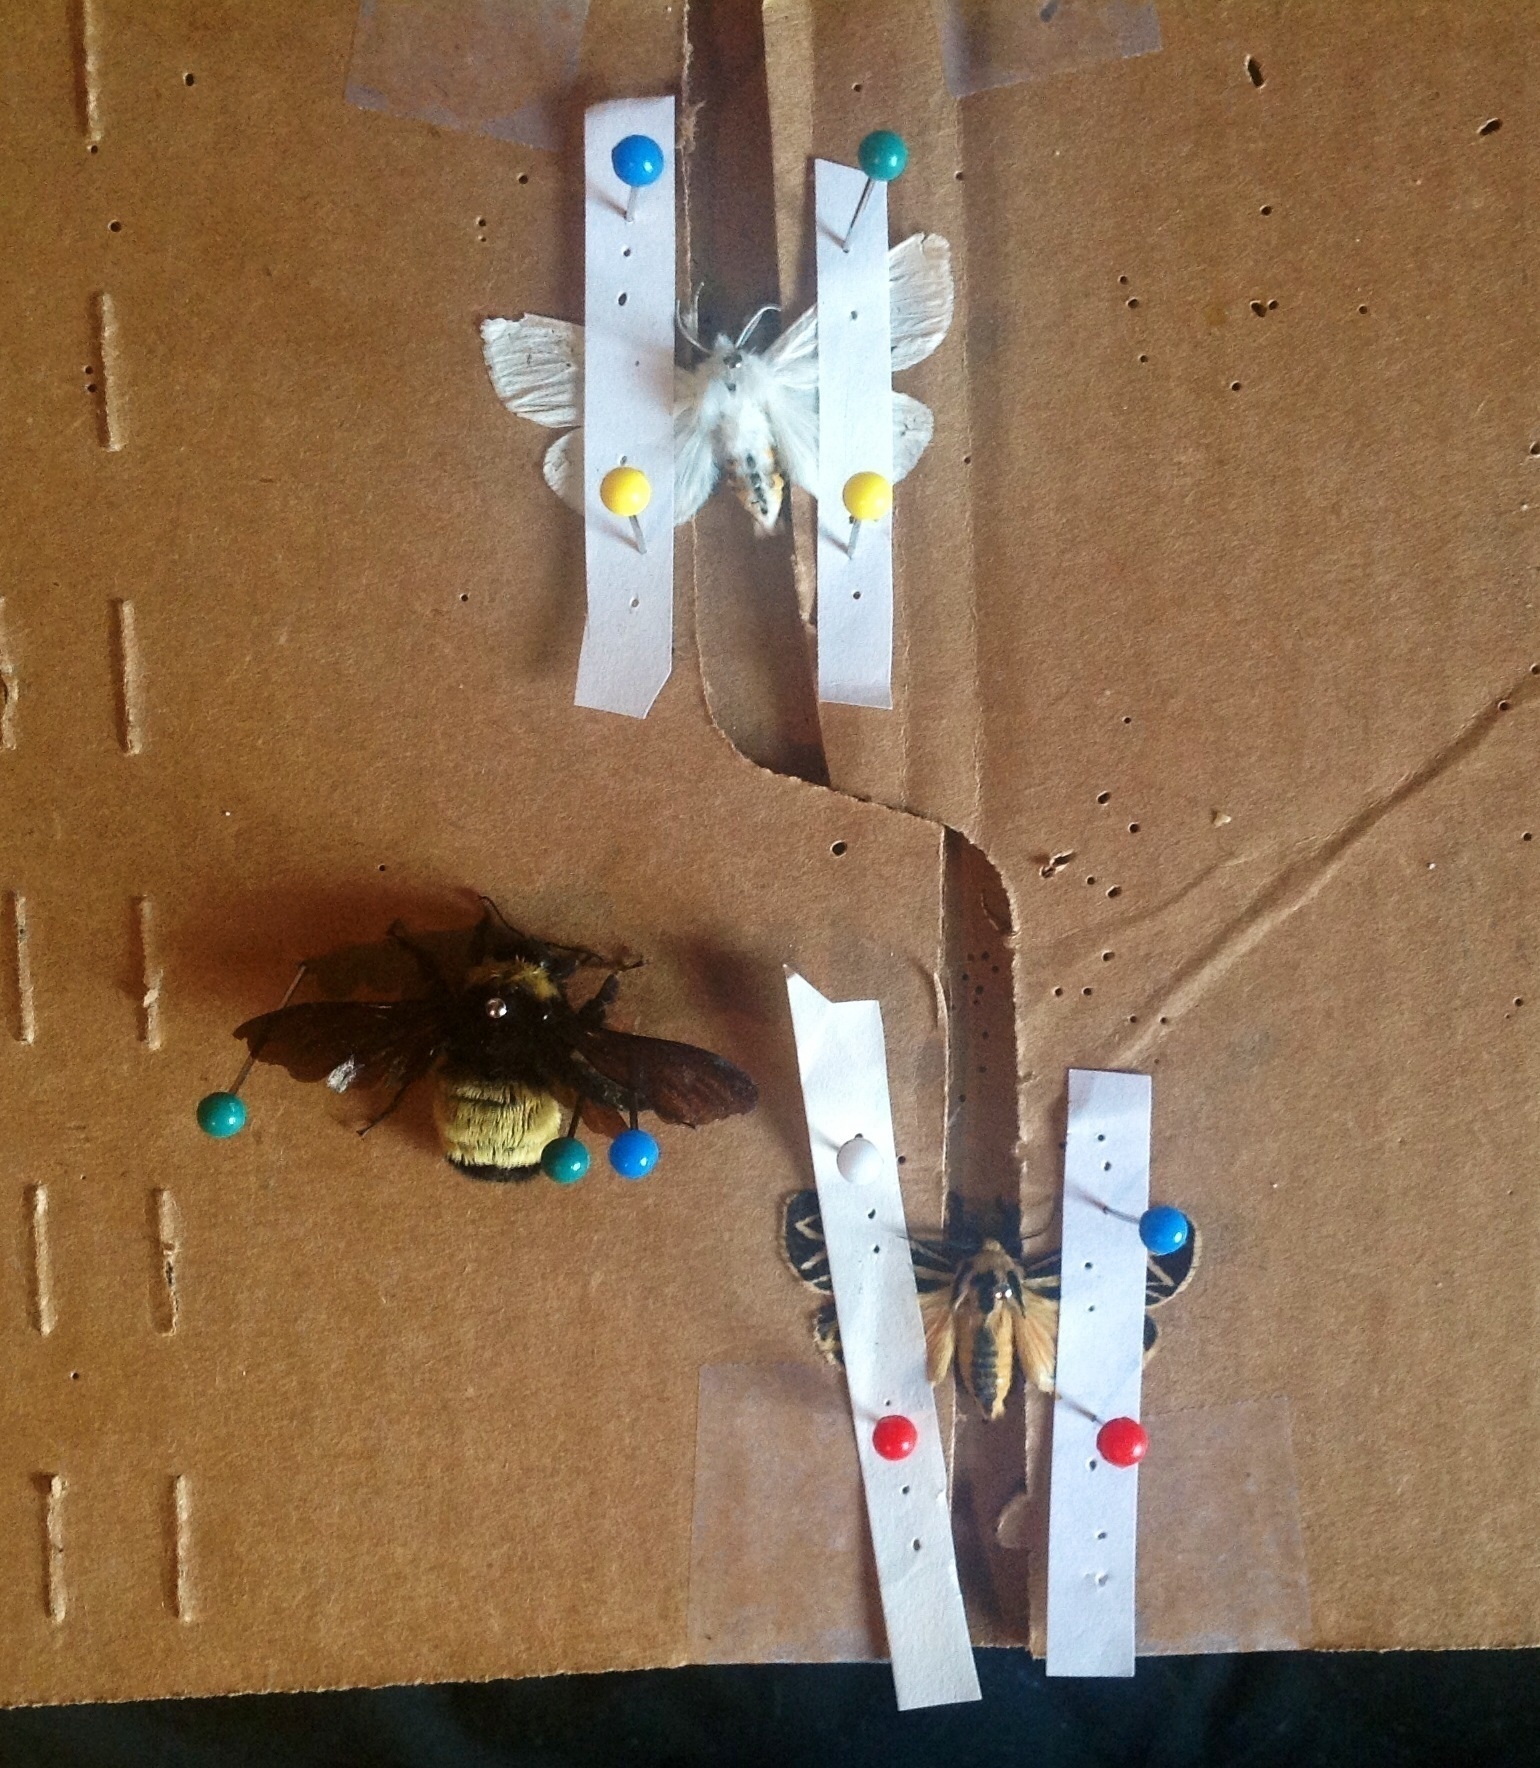
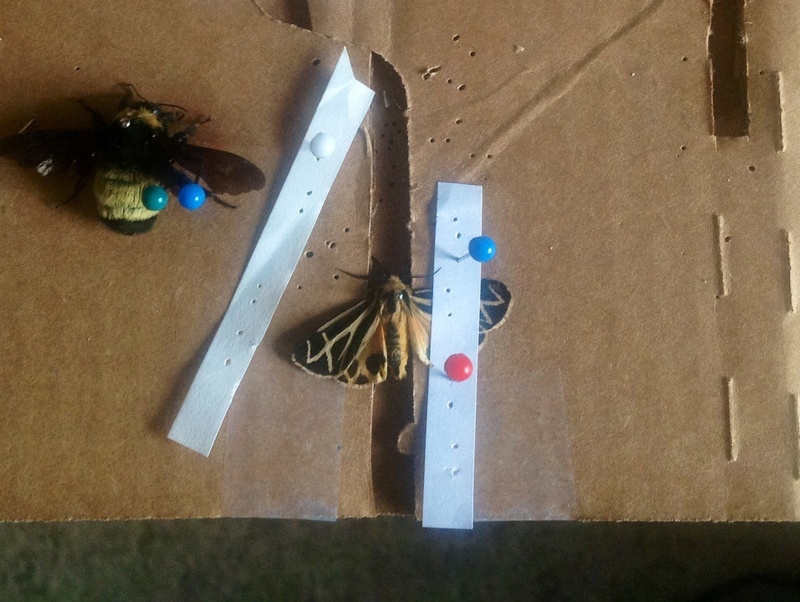
Heres my "Spreading Board" (see pic). Mine is made from thick cardboard, which i cut small slits into, to sit the insects body in.
Also cut small thin strips of paper to hold down the wings. & get some sewing pins.
.
** Watch a quick video (not mine) on pinning here: http://www.youtube.com/watch?v=KFacqZ9CM4w -
 Step 8
You could buy stupid expensive Pins to pin your bugs, but why??
.
Cheap Way: I use regular sewing pins! & for the ones in the insect, I just bite the end balls off. lol It works perfectly! -
Step 9
(Now for most difficult parts)
Place bug body in crevice of S-board & pin it thru its middle thorax ...trying not to ever touch the bugs wings. Pin it firmly to the board also.
.
**This is extremely hard for butterflies, who die with wings closed up. Takes patience. (For pics i am using a moth; much easier.)** -
 Step 10
+ Pin one end of paper-strip above the wings.
+ Use a extra pin to easily drag wings up & out (do not pierce wing! Be very gentle). Once theyre mostly out, lay strip ontop of them, holding wings down with finger overtop strip.
+ Use the pin to contine to position the wings where you want them, (never touch wings with ur hands!).
+ Once satisfied, hold in place, & pin the paper tight on the other end.
.
**This really just takes practice, its very annoying & difficult ...you will curse at some point. >.< ** -
 Step 11
Repeat for other wing.
.
Once you have them lookin good...
Set board somewhere safe to dry out insect, for at least a week. -
 Step 12
Heres a side view. :)
-
 Step 13
You do the same for other bugs with wings ...like grasshoppers, dragonflies, etc.
.
On hard bodied bugs (like the bumblebee in my pictures & beetles) you can just use pins to position legs, antenna, wings... without the paper strips!. Just move it in place with pin, & stick the pin next to it. -
 Step 14
*Once dry, the bugs become extremely fragile & break easily!*
.
. anywho..a week later...
Carefully remove the holding strips, & lift the bug out by the pin. -
 Step 15
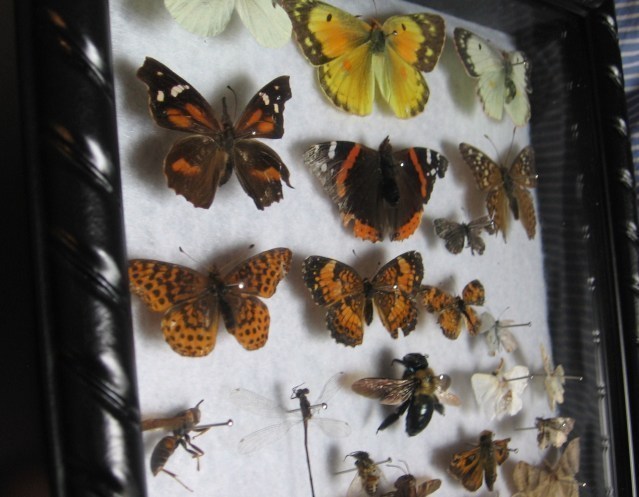
Pin your new specimen to a Display Box, & your done!
.
(Learn to make a awesome Bug Display Box in my tutorial here!: http://www.cutoutandkeep.net/projects/bug-display-case ) -
Step 16
ALTERNATE WAY: (someone asked me about this)
If you find a DEAD BUG that you like, you might be able to pin it also.
If it hasnt been dead too long, it can be re-hydrated to become soft & managable again.
All you do is stick it into a killing jar with WATER instead of alcohol on cottonball. Within 2 days, it will get soft again. ...then you do the same pinning process! (if it ever smells, i wouldnt use it tho eww)


CO + K User
If its so "wrong and dumb", then where do u think those "used" bugs came from? some one killed them too. I dont feel that bad about it, bc most bugs r going to die within a month anyway, & none of them r endangered. Like i said before, how i kill them is probably more human then how they would die naturally.
CO + K User
BTW insects DO NOT feel pain anyway, bc they have no spines or central nervous system. Thought id point this all out. ...Thanks to the people that enjoyed my tutorial tho, hope to see ur collections!!
I think this project is AWESOME, and I will be creating a display with my sons.
There are VERY FEW protected species of bugs ...& there r more bugs in one species, then there are people on the planet anyway! LOL idk why everyones so upset. You kill them in your house, dont u? Id just rather admire & appreciate them, instead of butchering them with fly swatters & sticky-strips. lol (BTW Butterflies usually only live 2 weeks anyway!)
There are VERY FEW protected insects. I doubt any of us would ever see those in the wild. There are more bugs in 1 species, then there are people on the planet ...so if everyone did this, it still wouldnt make a dent on their livelyhood. :/