About
Made from a paper bag!
I stumbled upon Blackbird and the Owl (http://www.etsy.com/shop/BlackbirdAndTheOwl) on Etsy one day and fell head-over-heels-in love. Seriously, their designs are gorgeous.
Then Jennifer from ArtInOurBlood (http://artinourblood.blogspot.com) posted this AMAZING outfit with this super DIY clutch. So I mashed the two ideas together!
You can paint the clutch with basically any design you want. I think a watercolour-esque landscape would be really beautiful. Hmmm...maybe next time?
Tags
-
 maham k. favorited Blackbird And The Owl Inspired Clutch
15 Jun 05:12
maham k. favorited Blackbird And The Owl Inspired Clutch
15 Jun 05:12
-
 tiffany.robinson.900 favorited Blackbird And The Owl Inspired Clutch
28 May 00:19
tiffany.robinson.900 favorited Blackbird And The Owl Inspired Clutch
28 May 00:19
You Will Need
-
 Step 1
First, use Jennifer's tutorial to make the base of your clutch. The link is up by the description bar above.
-
 Step 2
Then, draw out your flap shape. You can keep it as-is (a rectangle) or make an envelope clutch (a triangle) or something else (a curve, like me).
-
 Step 3
Cut out your shape and open up the flap. "Hem" it by folding over the edge to the inside of the clutch.
-
 Step 4
Tape the folds down. If your flap wasn't a straight line, use small pieces of tape. The smaller the piece of tape, the more coherent it will look.
-
 Step 5
This is what your flap should look like - it should have a clean edge.
-
 Step 6
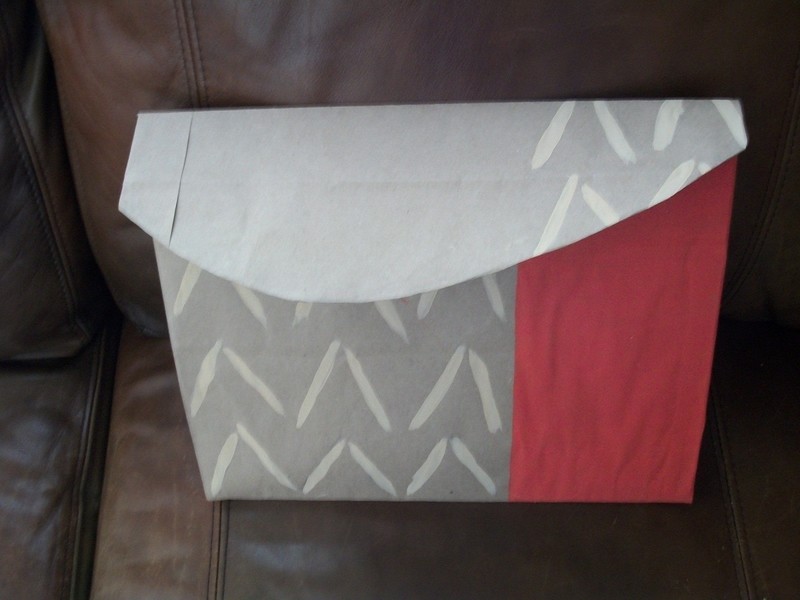
Now begin painting! You can use any design you want.
I'm using a Blackbird and the Owl design. I drew out a straight line with a ruler and am painting everything to the right of that line a reddish-orange colour.
-
 Step 7
Keep painting! I'm using a half-triangle design. Make sure every layer is dry before you add a new layer, colour, or design.
-
 Step 8
If you want to, paint the flap. Let EVERYTHING ON THE BODY DRY before you paint the flap. Then lay a piece of paper underneath the flap so you don't get paint on the body.
You can paint the back of the clutch if desired. I chose to leave it as-is.
-
 Step 9
Let everything dry, then add anything else (studs, fringe, closures, etc.) Ta-da! You're done~