


About
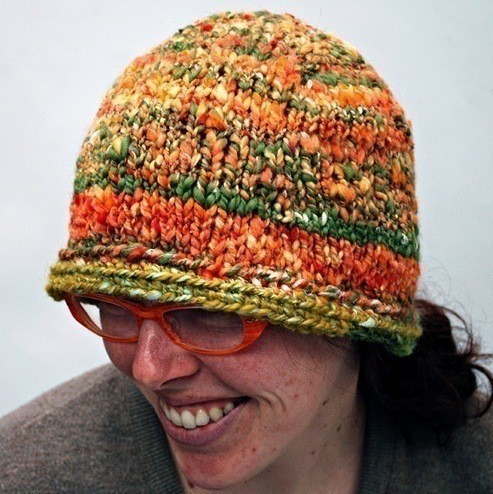
big bulky bucket hat!
yeah! i knit this up in no time, as an experiment, trying out this top-down idea with some gorgeous handspun, and it worked out so well that i decided to write up the pattern and share it with you!! because it’s knit top-down, you can easily make it exactly as long as you want without having to guess when to start decreasing. (or maybe it’s just me that has a hard time with that…)
-
 Carol B. favorited Big Bulky Bucket Hat
09 Feb 12:03
Carol B. favorited Big Bulky Bucket Hat
09 Feb 12:03
-
 Kay G. favorited Big Bulky Bucket Hat
30 Mar 20:16
Kay G. favorited Big Bulky Bucket Hat
30 Mar 20:16
-
 Martha G. favorited Big Bulky Bucket Hat
27 Sep 22:22
Martha G. favorited Big Bulky Bucket Hat
27 Sep 22:22
-
 Step 1
co 4 sts on dpns
join around, kfb into each of the 4 co sts
-easiest way for me to do this:
..co 2 sts on each of 2 needles
..kfb into first st with 1 needle, kfb into 2nd st with 2nd needle
..kfb into first st on 2nd needle with 3rd needle, kfb into last st with 4th needle
there should now be 2 sts on each of 4 needles
kfb first st of each needle as you knit around, until you have 15 sts on each (so 60 sts total)
knit around about 9 rows, or about 2 1/2 inches, or until flattened hat measures about 6 inches from top
kfb first st of each needle, one round
knit 2 rounds with no increases
repeat those 3 rows 2 more times
knit one more increase round which should give you 19 sts per needle
bind off, crochet a trim to prevent curling (in the example i single crocheted around twice, into the back loops only)
block as neededif you don’t want a crochet edge, you could probably knit the last 4 or 5 rows in seed stitch instead.
depending on your yarn, you may want to use make 1 increases instead of kfb for the bottom section to prevent unwanted bumps.

Comments

