


About
For your desk, parties, very charming...and cute!
Looks fantastic with two sided scrap booking paper. (thinner scrap-booking paper)
-
 Teresa S. favorited Beautiful Origami Candy Box
02 Sep 13:03
Teresa S. favorited Beautiful Origami Candy Box
02 Sep 13:03
-
 Diana P. favorited Beautiful Origami Candy Box
01 Oct 03:12
Diana P. favorited Beautiful Origami Candy Box
01 Oct 03:12
-
 Aishwarya Purohit favorited Beautiful Origami Candy Box
02 Jan 06:37
Aishwarya Purohit favorited Beautiful Origami Candy Box
02 Jan 06:37
-
 Marion T. favorited Beautiful Origami Candy Box
04 May 01:00
Marion T. favorited Beautiful Origami Candy Box
04 May 01:00
-
Cailyn R. favorited Beautiful Origami Candy Box
25 Mar 14:49
-
Anastasia S. favorited Beautiful Origami Candy Box
22 Jan 17:23
-
 Kerisu favorited Beautiful Origami Candy Box
26 Jul 05:29
Kerisu favorited Beautiful Origami Candy Box
26 Jul 05:29
-
 buttercup303 added Beautiful Origami Candy Box to boxes
03 Jul 13:18
buttercup303 added Beautiful Origami Candy Box to boxes
03 Jul 13:18
-
buttercup303 added Beautiful Origami Candy Box to origami / papercraft
03 Jul 12:49
-
 Claire C. favorited Beautiful Origami Candy Box
20 Nov 17:14
Claire C. favorited Beautiful Origami Candy Box
20 Nov 17:14
You Will Need
-
 Step 1
I started with a six inch by six inch piece of paper...(dual colored) - but by all means, the 12 inch by 12 inch are beautiful too...fold in half. Then unfold.
-
 Step 2
I want you to fold in half the other way. I'm keeping my "red" color on the inside. Then unfold again.
-
 Step 3
Turn the model over so that the blue side is up. Press your finger down at the centre point as shown. This will help to make your next fold. See next step.
-
 Step 4
Fold up corner to corner diagonally and complete the fold.
-
 Step 5
Turn the paper over so that the red side is up. Press your finger down at the centre point.
-
 Step 6
This is what your model should look like now. :)
-
 Step 7
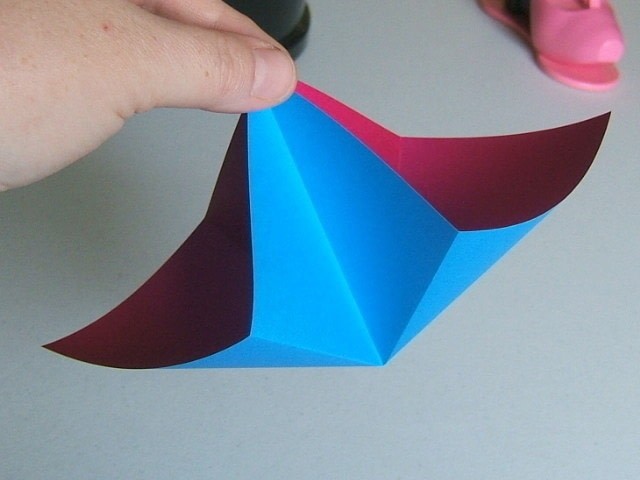
Bring up the two corners as shown in the diagram.
-
 Step 8
Now bring up the other two corners, and lay the model down. You will have a closed pointed end, and one open end just like in the diagram.
-
 Step 9
Now we are going to make a crease down the middle by folding the model in half, and then unfolding it again.
-
 Step 10
Keep the closed pointed end towards you. You should have 2 "flaps" on the right hand side, and 2 "flaps" on the left hand side.
-
 Step 11
With the closed pointed end facing you, bring in one of the right hand "flaps" townard that centre line. Then do the same for one of the left hand "flaps" as shown.
-
 Step 12
Turn over and do the same to the back. This is what your model should look like now. :)
-
 Step 13
Now we are going to open the left flap a little bit and "squash" fold it....just like the diagram. See the next step. Complete the crease, and then do the same for the right hand side.
-
 Step 14
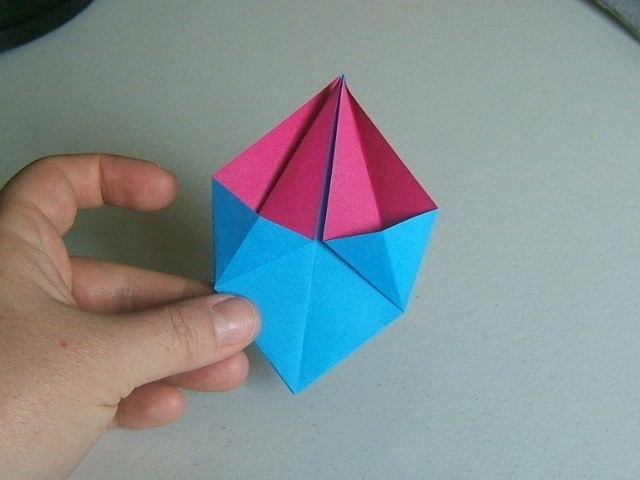
This is what your model should look like. Turn the model over and repeat step 13 to the back.
-
 Step 15
Now fold the flaps over so that the front and the back of the model look like this (the "red" is hidden in BETWEEN the flaps) Now if we look closely at this model you will see the centre line. You will also see two diagonal lines, one on the right hand side and one on the left hand side. I want you to use that crease line and "reverse" fold. See next step.
-
 Step 16
Here is the reverse fold, then crease the paper to complete the fold. Repeat for the right hand side. Turn the model over and repeat this step.
-
 Step 17
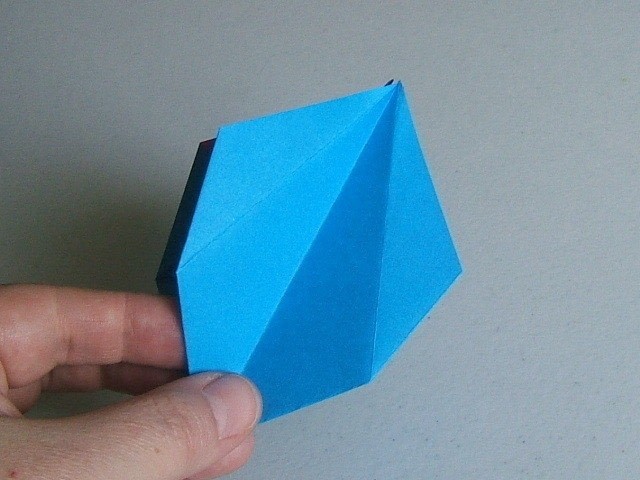
Completing step 16....:)
-
 Step 18
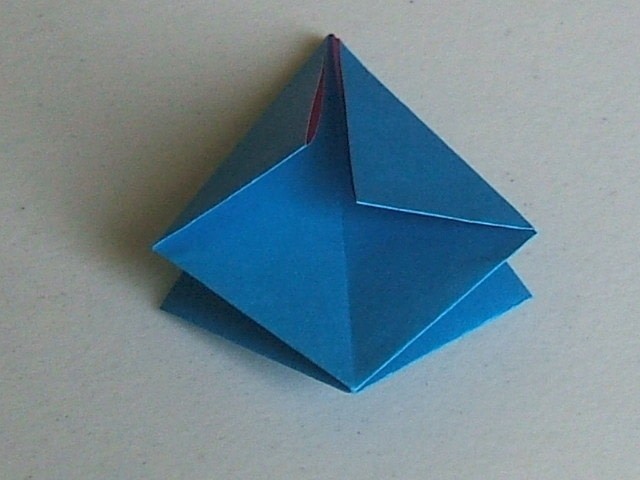
Okay...this is what our model should look like now.
-
 Step 19
I am starting to bring the first tip downward as far as it will go.
-
 Step 20
This is as far as it will go. Crease the paper. Fold gently over and repeat the process 3 MORE times.
-
 Step 21
This is what our model looks like now. :) We're almost done.
-
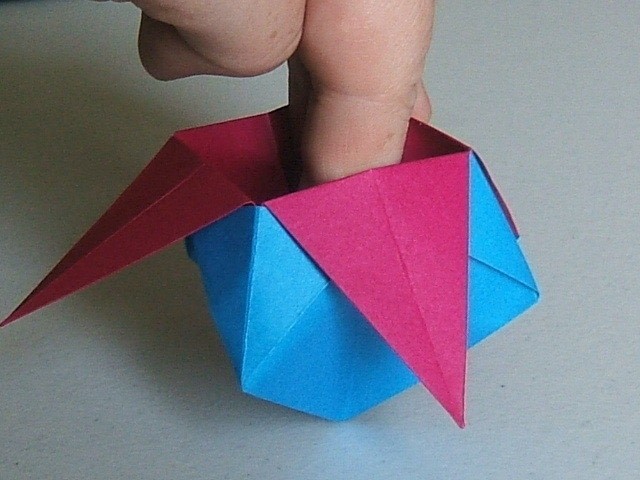
 Step 22
Open the box gently as shown...
-
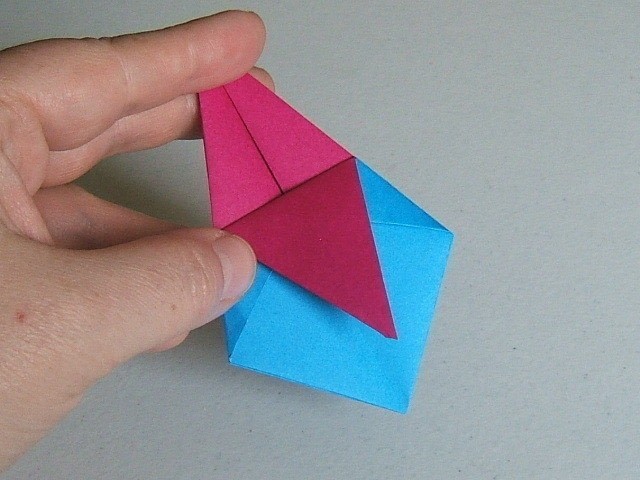
 Step 23
Place the "pointed" bottom against the table and press down with your finger. Gently spread the insides of the box open with two fingers, working the corners.
-
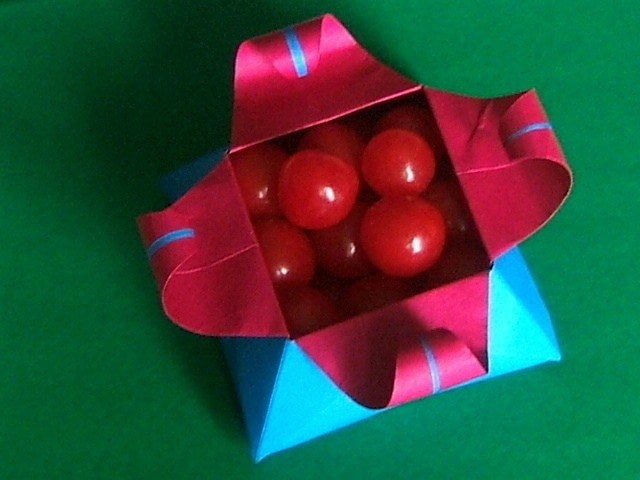
 Step 24
Here is our box! Now you can take the smooth handle of an artist paintbrush to paper curl the ends.
-
 Step 25
You can curl the ends towards you, or away from you, or even just leave them straight if you wish. :)
-
 Step 26
You did it! Now add some candy and enjoy!
I hope you enjoyed this "how to"
:)
Lanie


Hope this helps.
but i get confused at step 16
awesome idea!!!!
good how to