

About
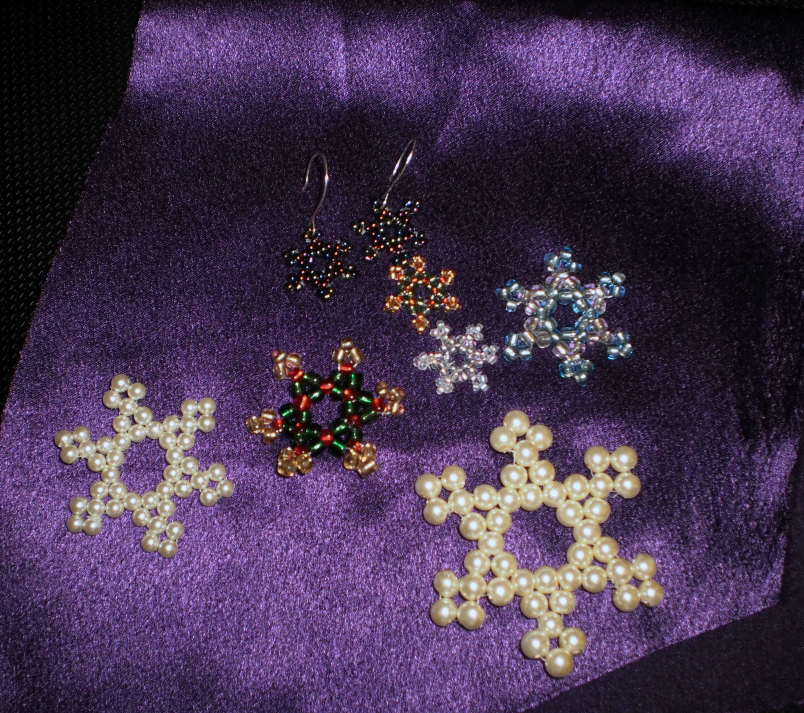
Adorable snowflakes for the holiday season.
These are snowflakes I've been making as little extras to my family's Christmas gifts (and in some cases, as their gifts)!
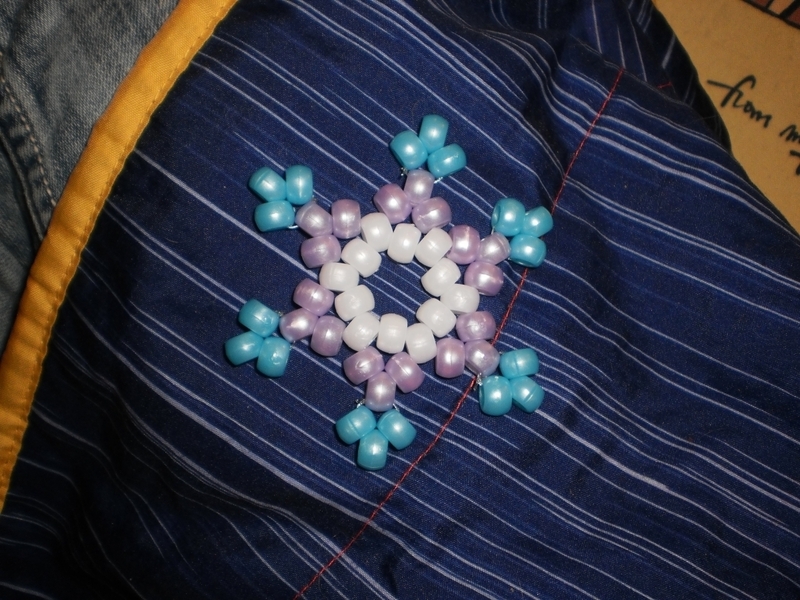
They're relatively simple to make, similar to a beaded star. However, the smaller the beads, the more annoying it can be and the longer it will take, which is why I've set the difficulty to so-so, and the time so high. The smallest snowflakes in the picture are made with seed beads, and are about the size of an American quarter, just so you have a size reference!
A couple of them I'm going to make into ornaments (meaning I'm going to tie a string through one of the points :P), one pair I've made into earrings, and I'm thinking about making one into a brooch for my cousin.
My favorites are the little bitty ones and the pearl ones (just because I think those are really "classic" looking). :3
If anybody wants a tutorial, let me know! I'll be glad to turn this into one (using pony beads for ease and visibility)!
EDIT: This is now a how-to. ;D
Tags
-
 Alice N. added Beaded Snowflakes to Technique
07 Dec 20:46
Alice N. added Beaded Snowflakes to Technique
07 Dec 20:46
-
 Carla H. added Beaded Snowflakes to xmas
07 Dec 00:10
Carla H. added Beaded Snowflakes to xmas
07 Dec 00:10
-
 Jem L. favorited Beaded Snowflakes
07 Nov 19:56
Jem L. favorited Beaded Snowflakes
07 Nov 19:56
-
 Victoria B. favorited Beaded Snowflakes
18 Oct 11:13
Victoria B. favorited Beaded Snowflakes
18 Oct 11:13
-
Victoria B. added Beaded Snowflakes to beaded treasures
15 Oct 11:53
-
 RareJewel added Beaded Snowflakes to Easy & Low Cost Holiday
12 Oct 06:04
RareJewel added Beaded Snowflakes to Easy & Low Cost Holiday
12 Oct 06:04
-
RareJewel favorited Beaded Snowflakes
20 Jul 06:48
-
Rebecca K. favorited Beaded Snowflakes
20 Dec 22:35
-
 jaynee.lucas favorited Beaded Snowflakes
09 Dec 07:57
jaynee.lucas favorited Beaded Snowflakes
09 Dec 07:57
-
Debbie E. favorited Beaded Snowflakes
11 Oct 12:16
-
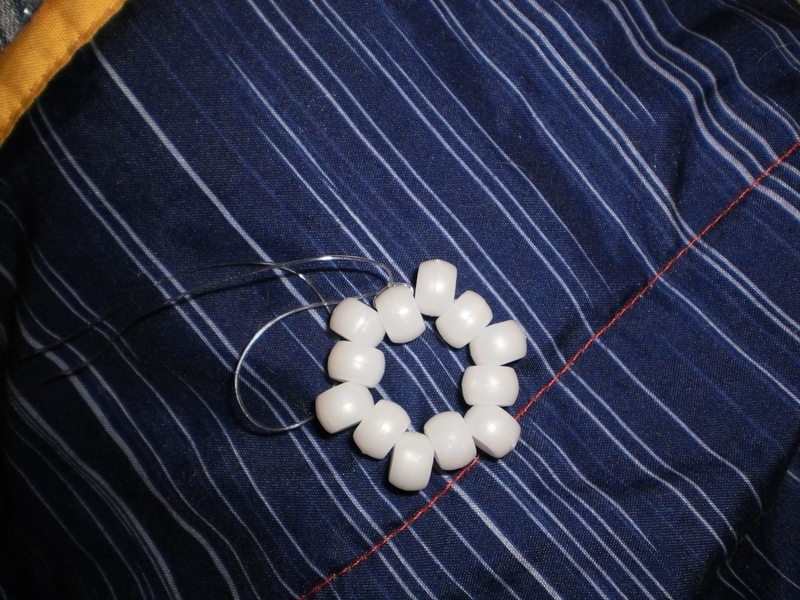
 Step 1
Thread twelve beads onto a piece of string. Slide the beads along the string a bit so that you have one really long end and one end long enough to tie it off.
-
 Step 2
Annnnd tie it off! What I do is usually take one end through the last bead, so the string is crossed inside of the bead, and then tie it off so the knot rests on top of that bead.
Sorry if that sounds a little convoluted, and if it got confusing, don't worry about it and just tie it.
DON'T cut it yet! It makes it a lot easier if you don't.
-
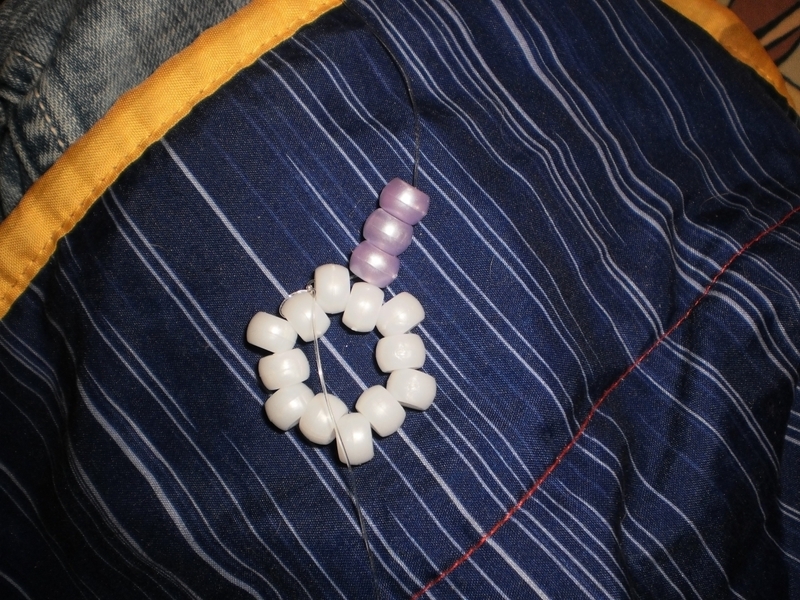
 Step 3
Arrange the beads so that every other bead is sticking up. I make sure the bead I tied off on is one of the lowered ones.
Put the long piece through one of the beads that is sticking up.
-
 Step 4
String three beads on!
-
 Step 5
Put the string through the next bead that's sticking up, and you've formed a point! Like I said, it's similar to making your standard beaded kandi star or what have you, just with an extra point plus a few beads. :)
Continue all the way around, stringing three beads on and then through every other bead (the ones sticking up!) of your base of 12, and keep your string taught.
-
 Step 6
When you've finished with step 5, you should have something like this. Go ahead and string the piece you've been putting the points on through the first "sticking up" bead that you strung through, and then tie it off using the tail left over from when you tied off the 12 base beads.
Now you can cut the string, but don't throw it away! If you have left over pieces that are long enough, you can use them for the next part!
-
 Step 7
Put a piece of string through the middle bead of one of your 6 points! I don't really know how much string I use for this whole section, I just sort of wing it depending on the size of the bead. But I'd guess it's usually 4 or so inches for each point.
-
 Step 8
Put three beads on this piece of string!
-
 Step 9
Tie it off! Cut it, and keep using whatever string you can. I put a dab of clear nail polish on all of my knots through this whole process. Here, however, I think it would be most prudent.
-
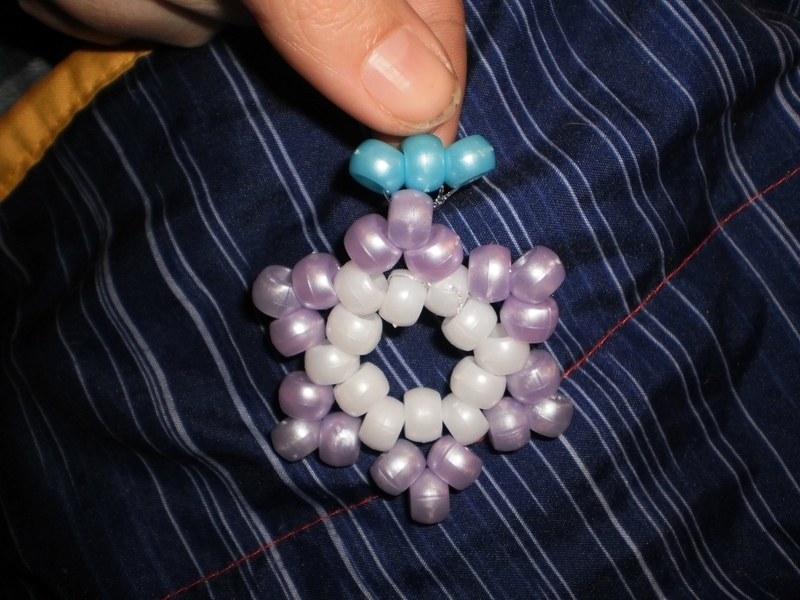
 Step 10
Now, you see how it looks flat and not really at all like the point of a snowflake?
You can do this after you've tied on the rest, but you'll want to sort of pinch the middle bead and gently pull it up so that it sits a little higher than the other two beads.
-
 Step 11
You might have to pinch and poke it a little bit, but the point should look like this! This part is more difficult the smaller the beads get...just because it's harder to pull the middle bead up.
-
 Step 12
And keep tying on the three beads onto the middle bead of each "point"! Hopefully, the differently colored beads for each "layer" of the snowflake will be visually helpful for you :) .
That's your finished snowflake! I've used pony beads because it takes a shorter amount of time and it's just easier, but just about any size of round/rounded beads will do! You could probably do some pretty cool things with this method using differently shaped beads, like bicone beads! I'll have to test that theory out. C:


Comments


