


About
Basic Bead Stringing Jewelry and Clasp Tutorial
This tutorial is going to go over the principles behind stringing a basic single- or multi-strand piece of beaded jewelry, strung on beading wire. The main purpose of this lesson is to learn to attach a clasp to beading wire by means of a bead tip.
-
 Kimberly M. added Basic Strung Bead Jewelry to jewelry patterns
15 Jun 07:28
Kimberly M. added Basic Strung Bead Jewelry to jewelry patterns
15 Jun 07:28
You Will Need
-
 Step 1
First, take your length of wire and tie a knot. For a single strand piece of jewelry, tie the knot an inch to two inches down the length. For a double strand, tie your knot in the center of the length of wire. Good beading wires (which are made up of many smaller bundles of extremely thin wires) are very flexible and will hold a knot easily. Those with less, bigger base wires are less flexible and should be avoided. I usually use Acculon or Soft Flex.
-
 Step 2
Feed both ends of wire through the hole in the bottom-clamp bead tip. Slide tight against knot.
-
 Step 3
Next you're going to string a sterling silver crimp bead over the two ends of wire. I always use sterling silver or gold filled crimp beads, even when working with plated metals. Plated base metal crimp beads are available, but the metals are not as malleable, and have a tendency to create weak points when crimping that can break later on, especially if supporting a heavy piece of jewelry. If anyone has had a bracelet or necklace break at this stress point before, you know that it can make a big mess, and be very sad!
-
 Step 4
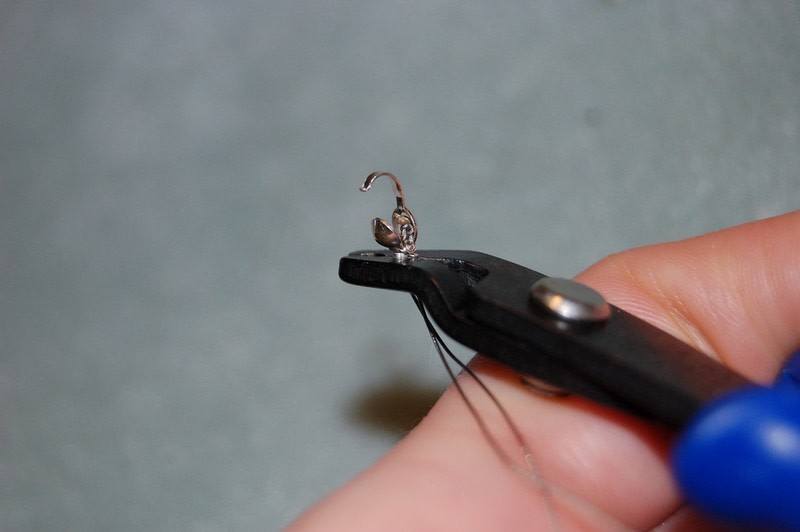
Using the back, u shaped section of your crimping pliers, create a rounded fold in the crimp bead that will begin the tightening around the wires. Place the side of the pliers that creates the divot in the bead on the underside of the bead tip so that the seam is on the bottom of the bracelet.
-
 Step 5
Pull the ends of wire into the separate sides of the crimp bead, the bend separating them. Place the front, rounded section of the crimp pliers on the sides of the bent crimp bead, the side with the bend facing out. Slowly squeeze using light pressure until the bead closes in on itself most of the way. Rotate the pliers so the seam is against the inside of the rounded section and tighten the rest of the way, creating a nice cylindrical tightened crimp bead.
-
 Step 6
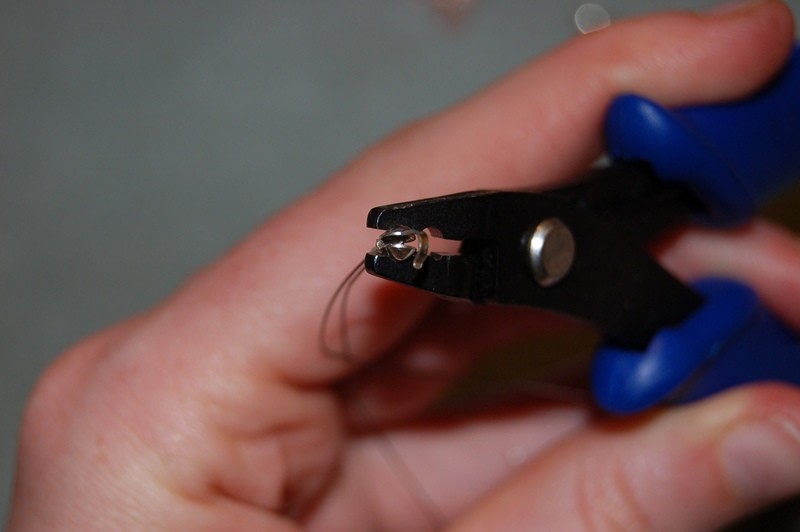
Close the rounded sides of the bead tip with the front, rounded section of the crimp pliers. Be careful not to squeeze too hard and dent the sides. Tighten the hinged bottom with needle nose pliers, and re tighten the bead tip sides if needed.
-
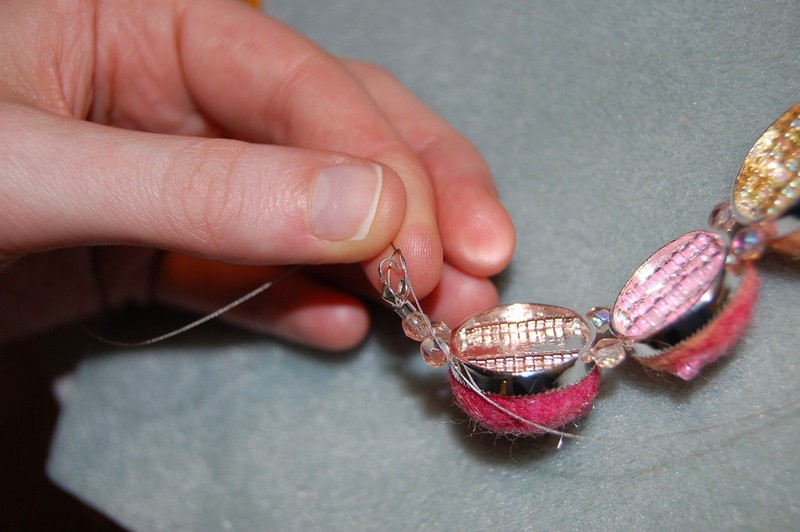
 Step 7
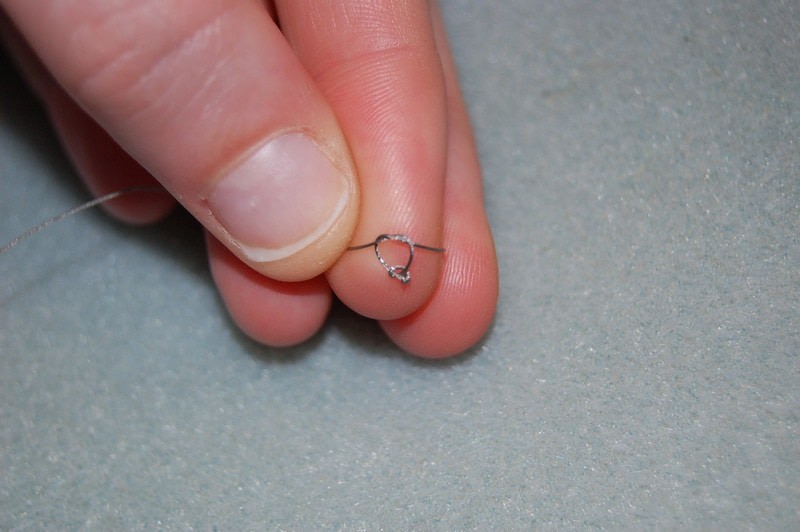
Close loop on hook at top of bead tip using round nose pliers. Open a jump ring by twisting sideways (NOT pulling apart, which distorts the shape of the ring), slide one end of a clasp (I'm using a lobster claw clasp here) onto one side and place the other side through the loop on the bead tip. Twist the jump ring closed tightly. Usually I have to twist just past what looks matched up to get it to close nice and evenly.
-
 Step 8
Add a crimp bead cover and slide it down over your tightened crimp bead. This is optional, but really gives a finished look to your jewelry ends. A crimp bead cover is an open, hollow metal bead that hides your crimp bead. Once it is slid over the crimp bead, carefully close the bead, either using needle nose pliers (very gently) or using the rounded front section of your crimp pliers. I tend to use both, using the round end of the crimp pliers to close it most of the way, and the needle nose to tighten up the seam the rest of the way.
-
 Step 9
At this point, you can string your piece of jewelry as you wish. When you get to the end of your piece, string a crimp bead and then a bead tip with the clamshell facing away from the bead. If you've done a double strand bracelet as I have here, string these onto both wires.
-
 Step 10
Tie your bead wire as before, tightening the knot deep into the cup of the bead tip. If you have one strand, tweezers can be a big help here. Once the knot is tied, slide the end(s) of the wire back through the bead tip, the crimp bead, and a few of the beads down the end of the piece of jewelry.
-
 Step 11
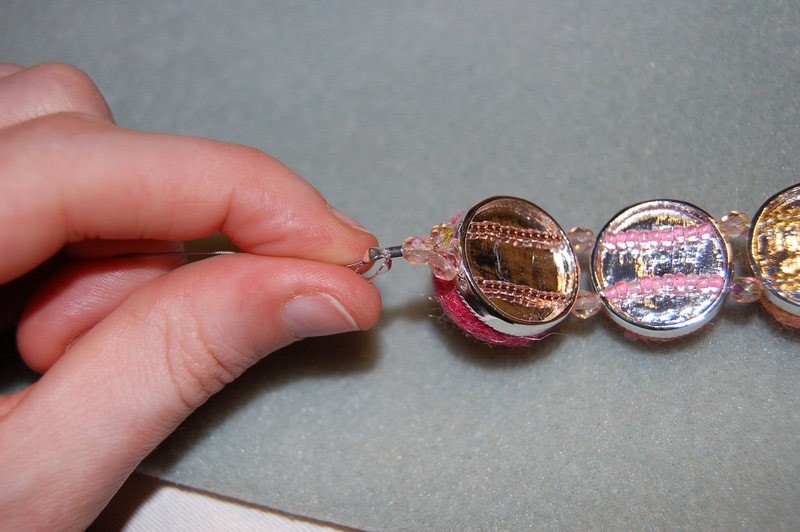
As before, tighten crimp bead over wire and close bead tip. Add a crimp bead cover to finish the look of the bracelet by hiding the crimp bead. Create a loop in the top hook of the bead tip with round nose pliers, and add a jump ring or a length of chain or chained jump rings, then your other end of your clasp. In this case, a large jump ring acts as my closing end of my clasp.
-
 Step 12
Here's our finished bracelet! Close your piece of jewelry using the clasp, wear, and enjoy!


snaps to you!