About
Make an autumnal fascinator perfect for Halloween.
-
 Key West Witch favorited Autumnal Fascinator
26 Jun 22:33
Key West Witch favorited Autumnal Fascinator
26 Jun 22:33
-
 Emma H. favorited Autumnal Fascinator
31 Oct 22:50
Emma H. favorited Autumnal Fascinator
31 Oct 22:50
-
 Crafterella added Autumnal Fascinator to Burns Night
06 Dec 12:33
Crafterella added Autumnal Fascinator to Burns Night
06 Dec 12:33
-
 Melia P. added Autumnal Fascinator to Accesorize
30 Nov 05:43
Melia P. added Autumnal Fascinator to Accesorize
30 Nov 05:43
-
 anita.n.g favorited Autumnal Fascinator
08 Jul 18:50
anita.n.g favorited Autumnal Fascinator
08 Jul 18:50
-
 Mad H. added Autumnal Fascinator to Hair and Bows
03 Mar 01:35
Mad H. added Autumnal Fascinator to Hair and Bows
03 Mar 01:35
-
 jennyplum6 added Autumnal Fascinator to My loves
30 Sep 20:18
jennyplum6 added Autumnal Fascinator to My loves
30 Sep 20:18
-
jennyplum6 favorited Autumnal Fascinator
30 Sep 20:13
-
 Lady Blucher favorited Autumnal Fascinator
12 Jul 11:05
Lady Blucher favorited Autumnal Fascinator
12 Jul 11:05
-
 Step 1
First of all look out lots of buttons and ribbon with a Halloween theme. You can get a huge range of printed ribbons and Halloween themed buttons from craft and online shops.
-
 Step 2
To make sinamay twists for the fascinator pull down the corner of your straight edge to find the cross grain.
-
 Step 3
Cut along the fold. Cut this peice into strips.
-
 Step 4
Be aware that the final twist will be quite a lot thinner. You can measure with a ruler and mark the sinamay with chalk or if you are like me, you can wing it and cut by eye.
-
 Step 5
Take one of the strips and fold in one of the edges using the iron. Then fold in the other edge. Edges can touch or over lap slightly. Pull the strip firmly and the strip will straighten. Use a damp cloth to release the glue in the sinamay. Now you can wind the strip around a pen or pencil and hold for a couple of seconds.
-
 Step 6
The strip will hold this shape. You can use a range of strips in different colours and sizes to create a whole range of hair pieces.
-
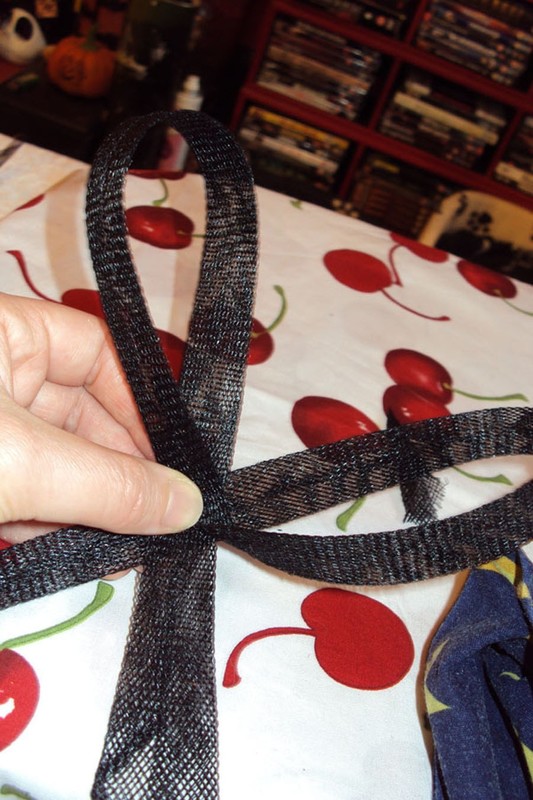
 Step 7
I have pulled a strip into a double loop.
-
 Step 8
I then sew it onto the hair clip as it has holes for this purpose.
-
 Step 9
You could hot glue it onto a comb however.
-
 Step 10
Decide which side of the head you will wear the piece before sewing on the sinamay.
-
 Step 11
I have decided to make a grown up looking piece today so have chosen a nice embroidered braid rather than my bat print ribbon.
-
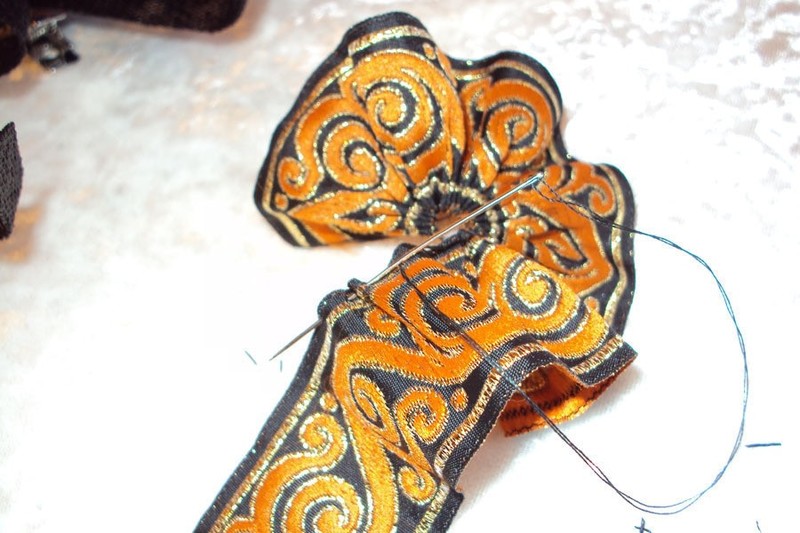
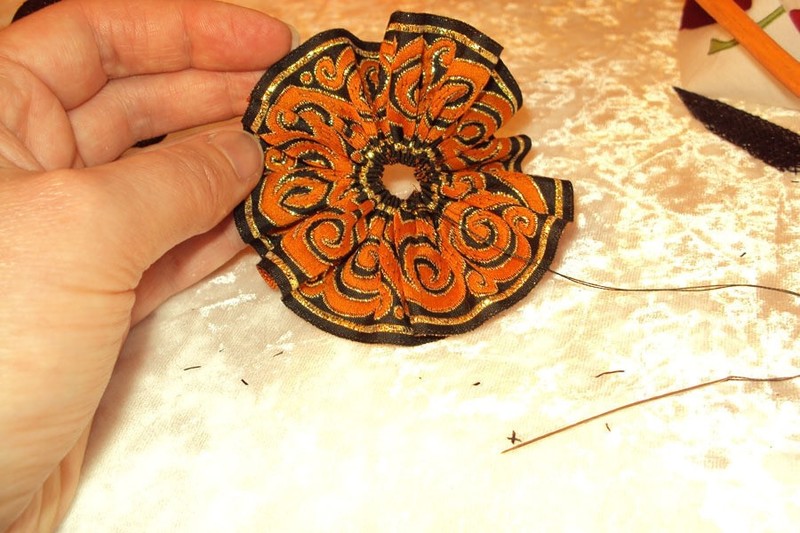
 Step 12
I have gathered the braid with a running stitch around the edge and pulled the ribbon into a rosette shape.
-
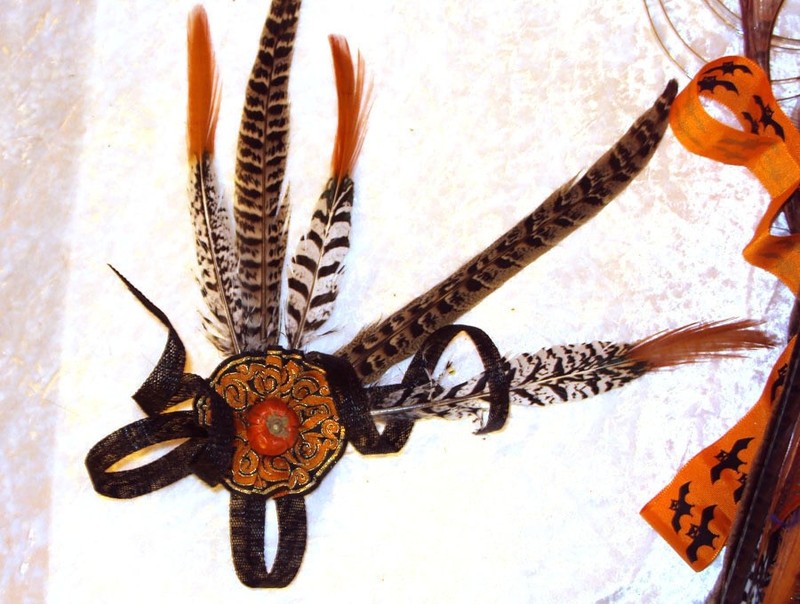
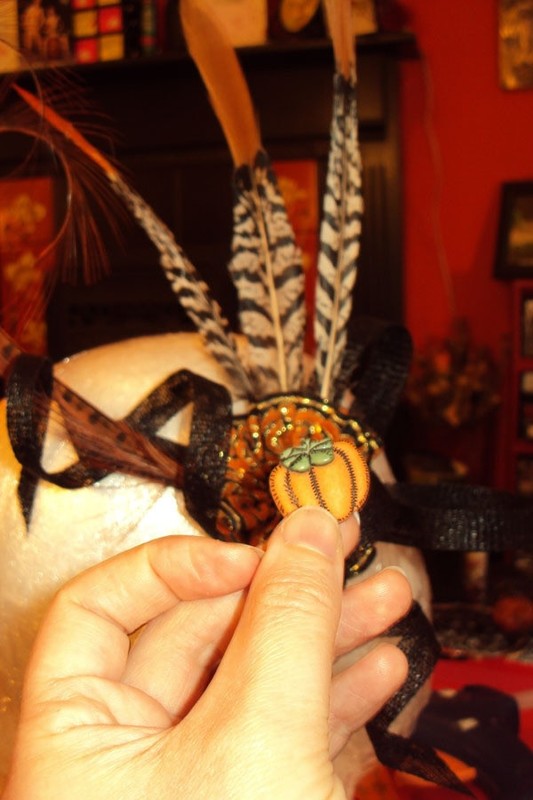
 Step 13
I used pheasant feathers and orange tipped feathers which I hot glued in behind the rosette. You could use more sinamay if you preferred.
-
 Step 14
Finally I put a dried pod which looks like a tiny pumpkin in the centre of the ribbon using hot glue.
-
 Step 15
Finally try and get your husband to take a decent picture of you wearing final piece.....good luck with that bit!