


About
Amigurumi Instructable Robot...In Love!
In this, my very first Instructable, I will show you how to crochet your very own Instructable Robot and his Love-Bot!
Crochet Terms I used:
US terminology
FO = finish off
BLO = back loops only
ends, tails = the strand of yarn that is left over after you finish off an object and cut the yarn. Always leave a fairly long tail for sewing the parts together!
Magic Ring = two loops around my finger, insert hook through loops, yarn over, pull through. There are also some really excellent picture tutorials online for the magic ring, but that's the way I do it.
sc = single crochet
sc inc = single crochet increase
Tags
-
 Galaxie A. favorited Amigurumi Instructable Robot...In Love!
29 Dec 02:44
Galaxie A. favorited Amigurumi Instructable Robot...In Love!
29 Dec 02:44
-
 DuckieyD added Amigurumi Instructable Robot...In Love! to Crochet
07 Feb 21:10
DuckieyD added Amigurumi Instructable Robot...In Love! to Crochet
07 Feb 21:10
-
 cristinakilljoyway favorited Amigurumi Instructable Robot...In Love!
20 Jan 17:28
cristinakilljoyway favorited Amigurumi Instructable Robot...In Love!
20 Jan 17:28
-
 Chocopanda favorited Amigurumi Instructable Robot...In Love!
05 Nov 02:42
Chocopanda favorited Amigurumi Instructable Robot...In Love!
05 Nov 02:42
You Will Need
-
 Step 1
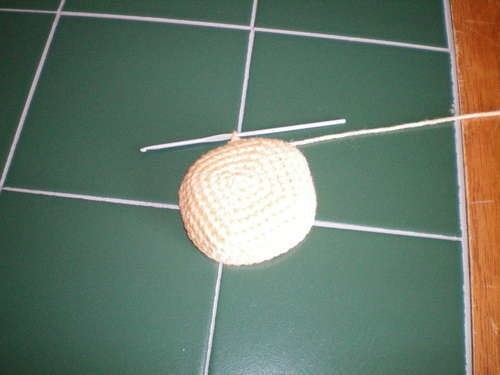
The Head
The Head Using gold/yellow yarn, or pink for the Love Bot: 1. 4 sc into magic ring, or chain 2, 4 sc in second ch from hook. ( 4 sc) Do not join rounds. 2. 3 sc into each st around (12 sc) 3. 1 sc, (3 sc in next st, 2 sc) 3 times, 3 sc into next st, sc in next. (20 sc) 4. 2 sc, (3 sc in next st, 4 sc) 3 times, 3 sc into next st, 2 sc. (28) 5. sc in BLO around (28… -
 Step 2
Reinforce the Head
Cut a piece of plastic canvas or cardboard to fit inside the head. Using 7 mesh plastic canvas, mine was 9 X 9 holes.
-
 Step 3
The Body
Using gold/yellow yarn, or pink for the Love Bot:
1. 4 sc into magic ring, or chain 2, 4 sc in second ch from hook. ( 4 sc) Do not join rounds.
2. 3 sc into each st around (12 sc)
3. 1 sc, (3 sc in next st, 2 sc) 3 times, 3 sc into next st, sc in next. (20 sc)
4. 2 sc, (3 sc in next st, 4 sc) 3 times, 3 sc into next st, 2 sc. (28)
5. 3 sc, (3 sc in next st, 6 sc) 3 times, 3 sc into next st, 3 sc. (36)
6. 4 sc, (3 sc in next st, 8 sc) 3 times, 3 sc into next st, 4 sc. (44)
7 - 9. sc around (44)
10. Do one sc inc on each side in the centre (48)
11 - 20. sc around (48)
FO
-
 Step 4
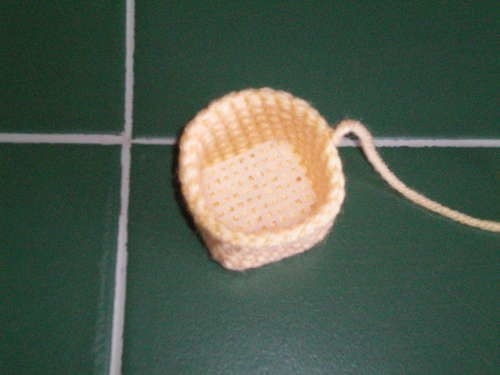
The Bottom
Using gold/yellow yarn, or pink for the Love Bot:
1. 6 sc into a magic ring, or chain 2, 6 sc in second ch from hook. (6 sc) Do not join rounds.
2. sc inc in each stitch around. (12 sc)
3. (1 sc, 1 sc inc) around. (18 sc)
4. (2 sc, 1 sc inc) around. (24 sc)
5. (3 sc, 1 sc inc) around. (30 sc)
6. (4 sc, 1 sc inc) around. (36 sc)
7. (5 sc, 1 sc inc) around. (42 sc)
8. (6 sc, 1 sc inc) around (48 sc)
FO
-
 Step 5
Reinforcing the Bottom
Cut a piece of cardboard or plastic canvas using the bottom as a guide. This will help keep the bottom of the bot relatively flat when stuffing it. -
 Step 6
The Limbs
The Arms (make 2)Using gold/yellow yarn, or pink for the Love Bot:
1. 6sc into a magic ring, or chain 2, 6 sc in second ch. from hook. (6 sc) Do not join rounds.
2. (1 sc, 1 sc inc) around. (9 sc)
3 - 9. sc around (9 sc)
FO
The Legs (make 2)
Using gold/yellow yarn, or pink for the Love Bot:
1. 6 sc into a magic ring, or chain 2, 6 sc in second ch from hook. (6 sc) Do not join rounds.
2. sc inc in each stitch around. (12 sc)
3 - 5. sc around (12 sc) Switch to black yarn (grey for the Love Bot) on last stitch of row 5.
6. sc around. (12 sc) Switch back to gold/yellow yarn on last stitch.
7 - 9 sc around. (12 sc)
FO
-
 Step 7
The Ear Do-Dads
Using Red, make 2.1. 6 sc into magic ring, or chain 2, 6 sc into second chain from hook. Do not join rounds.
2. sc around. (6 sc)FO
Using your tapestry needle, thread a piece of black yarn, knotting one end. Pull the black yarn through the centre of the ear do-dad. The knot will secure the black thread from coming through the hole. Cut the yarn into a short piece, as pictured, to make the black thingy on the do-dad. Use grey yarn instead of black for the Love Bot.
-
 Step 8
Assembly
1. Sew the Do-Dads to each side of the head as shown in the picture. Make sure they are even, and that the tail (end) from the head is to the back.
2. Using black yarn, embroider two black lines around each arm as pictured. (Embroider a zig zag around the arm in grey yarn for the Love Bot)
3. Sew a nut to the buttom of each leg using the gold/ yellow yarn (pink for the Love Bot). Make sure the nuts are facing the right direction (ie. hole to the front).
4. Stuff the legs and sew them to the bottom. I sewed one on each side of the first round, ensuring that the tail (end) of the bottom was facing the back.
-
 Step 9
Assembly Part Two
1. Stuff the head lightly. Square the head with the body, ensuring that the tails (ends) of both the head and the body are facing the same direction. Begin sewing the head to round four of the body, making sure that you are sewing it in a box shape and not a circle. When you are on the last few stitches, stuff the head more firmly before you sew it completely up. Weave in the ends.
-
 Step 10
Assembly Part Three, and Finishing Touches
1. Lightly stuff the body. Match up the back of the bot's body with the back of the bot's bottom. Begin sewing each stitch together around. When you reach the last few stitches, stuff the bot more firmly. Stitch shut, and weave in ends.
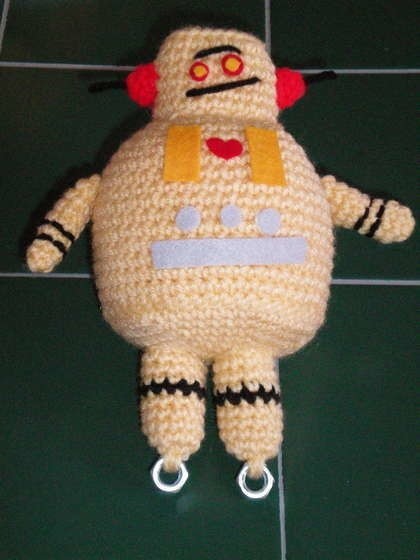
2. Using the following picture as a guide, cut out felt shapes for eyes, heart, chest doors, and bottom grey thingys. Glue each piece on using crafters glue. Embroider the unibrow and mouth on using the black yarn. Use grey for the Love Bot.
TA DA!!! You have your very own Amigurumi Instructables Robot! Now, use the same crochet instructions to make him a girlfriend using pink and grey, and decorate as pictured. Or come up with your own color scheme! Happy Valentine's Day!


thanks for sharing.