

About
easy made decorative hinge
Please excuse any typos, i am currently multitasking.
little back story - i am working on making me a steampunk book for my art sketches and i wanted it to have a swing latch. so i look to see what was for sale in many online stores. some places wanted like ten dollars and i was like WTF its a simple latch. so i made the decision to make my own. i wanted something simple so i researched. looked up as many hinges as i could. and then i thought about how i would make it with things i had at home. i don't have a forge so i cant to it that way.. so this is how i made mine. its not the right way or the only way but for now i am pleased with it.
---------------------------------------------------------------------
sorry about all the steps and images, i wanted things to make since. This is my first latch of any kind. its not perfect and it needs some adjustment and hopefully with time my latches will get more intricate. i also plan on posting a final image when my book is done so you can see the hinge in use. i am not sure if it could actually hold up a cabinet shelf, i made this for mostly decorative purposes but i do hope that it helps someone with their creative process. if you make a latch let me know! i am curious about how it comes out!
(PS: if you click on some of the images you will be able to see the details)
-
 gabriela.johnson.94 favorited A Hinge Turorial
17 Oct 13:54
gabriela.johnson.94 favorited A Hinge Turorial
17 Oct 13:54
-
 Lisa B. commented on A Hinge Turorial
20 Jun 16:18
Lisa B. commented on A Hinge Turorial
20 Jun 16:18
-
 GeJoPa favorited A Hinge Turorial
11 Aug 21:08
GeJoPa favorited A Hinge Turorial
11 Aug 21:08
-
 Sissi favorited A Hinge Turorial
02 Jun 14:42
Sissi favorited A Hinge Turorial
02 Jun 14:42
-
 rheaghan favorited A Hinge Turorial
23 May 22:26
rheaghan favorited A Hinge Turorial
23 May 22:26
-
 Craffy added A Hinge Turorial to Para hacer <3
02 Feb 20:47
Craffy added A Hinge Turorial to Para hacer <3
02 Feb 20:47
-
Craffy favorited A Hinge Turorial
02 Feb 20:47
-
 *Danielle* favorited A Hinge Turorial
03 Dec 13:10
*Danielle* favorited A Hinge Turorial
03 Dec 13:10
-
 Stephanie T. favorited A Hinge Turorial
18 Jul 01:40
Stephanie T. favorited A Hinge Turorial
18 Jul 01:40
-
Len favorited A Hinge Turorial
07 Jul 09:38
-
 Step 1
What i used:
-scissors
-round metal file
-aluminum wire (for the pin)
-needle nose pliers
-2 or 3 food can lids
-hole punch
-hammer
-permanent marker
-rivets
-paper -
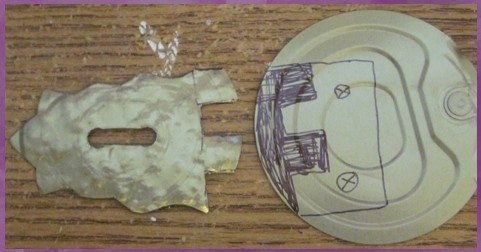
 Step 2
The first thing i did was draw and cut out a hinge like shape on a piece of paper to give me a sort of reference pattern, then i drew the first half of it on one of my tin can lids with my marker, and then i used my scissors to carefully cut the shape out. i cut it out a little bit at a time. tin is very sharp. i poked myself a few times, next time i will wear gloves! i also used crappy little scissors because i didn't want to ruin my good ones, but in the future i might invest in some nice metal cutters. anyway see the bottom can lid in the picture? that's the shape you want. i used a hole punch to add a hold in the center. i did it twice to give it an oval shape. the hole punch was hard but i didn't know what else to use. it worked okay so i stuck with it. i then filed the edges so they weren't as sharp. hammered the back to give it some texture and flatten out my lid.
-
 Step 3
when your done it should look like this so far!
-
 Step 4
i got mu other lid and drew the other side of the latch with my marker. marked out holes and where i was going to cut.
-
 Step 5
o.0
-
 Step 6
here i cut it out carefully then i used the hole punch again and filed the edges
-
 Step 7
i hammered it and compared it to my paper pattern
-
 Step 8
this is a tricky part, i used my needle nose pliers to curl my tabs
-
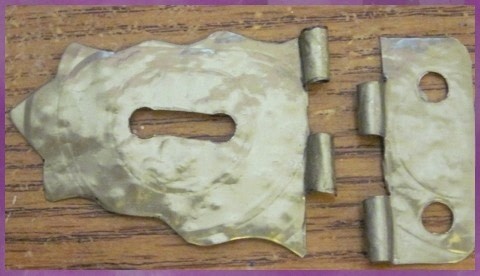
 Step 9
i inserted my aluminum wire to act as a pin to connect the two pieces. and now they are movable!
-
 Step 10
with a scrap piece i cut it into a long rectangle and drew my next pattern. (the piece where the latch hooks onto) i marked out the bend, i hammered my piece and cut the shape out. i hole punched my two holes and i used my pile to add the bend in the middle.
-
 Step 11
tested to see if the two pieces fit together.
-
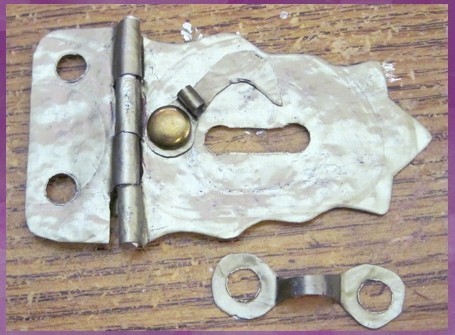
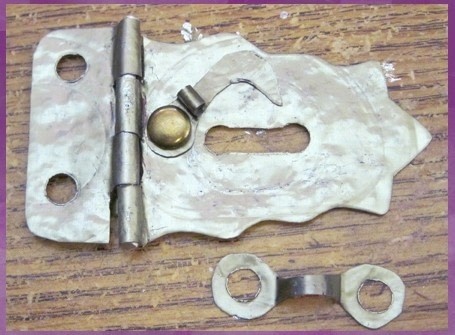
 Step 12
by now i think you can figure out what i did here to make the latch. just look at the image if you need help!
-
 Step 13
marked where the latch would be
-
 Step 14
hole punched said hole!
-
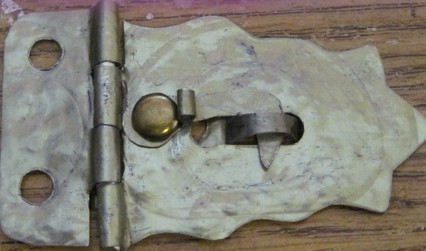
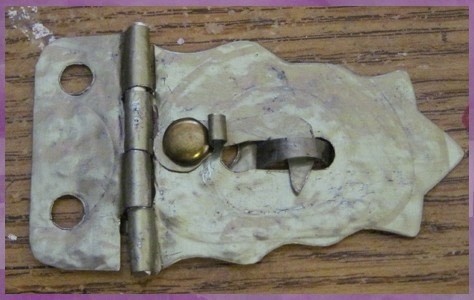
 Step 15
this is what it now looks like!
-
 Step 16
rivet your latch on!
-
 Step 17
tadaa you now have you swing latch hinge!
if you have any questions i will try my best to answer your questions.
EDIT:like i said really sorry about the typos. now that im relaxed i can see many of them >.<


Comments

