

About
Because six is better than four
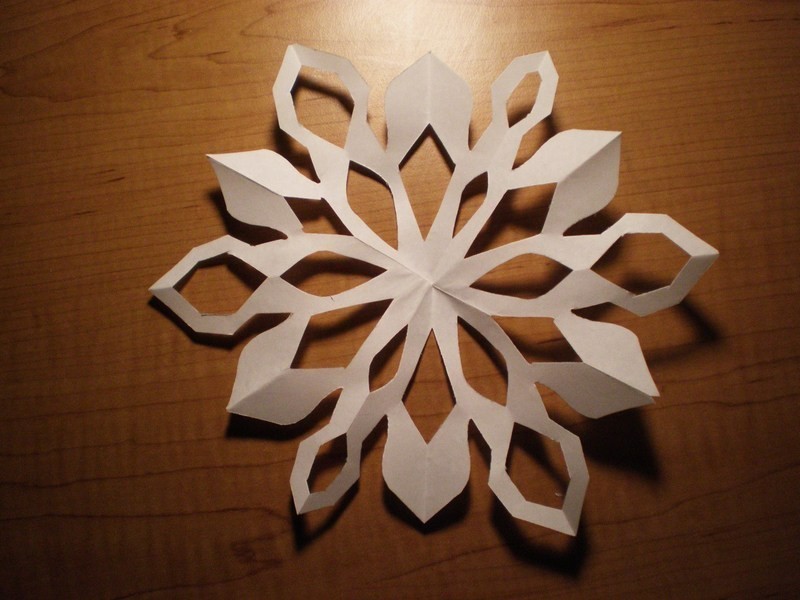
Most children are taught how to cut out 4-point snowflakes, but the 6-point snowflake is much more aesthetically pleasing, and really simple to do.
Tags
-
 Isoli Prince favorited 6 Point Snowflake
17 Mar 07:52
Isoli Prince favorited 6 Point Snowflake
17 Mar 07:52
-
 Philip M. favorited 6 Point Snowflake
13 Mar 08:16
Philip M. favorited 6 Point Snowflake
13 Mar 08:16
-
 Lee B. favorited 6 Point Snowflake
18 Aug 02:52
Lee B. favorited 6 Point Snowflake
18 Aug 02:52
-
 Sally F. favorited 6 Point Snowflake
25 Jul 20:48
Sally F. favorited 6 Point Snowflake
25 Jul 20:48
-
 lara.mayouhas favorited 6 Point Snowflake
02 Jan 01:55
lara.mayouhas favorited 6 Point Snowflake
02 Jan 01:55
-
Teri P. added 6 Point Snowflake to snowflake
12 Nov 09:16
-
 pinkshoesandbracelets favorited 6 Point Snowflake
31 Jul 03:53
pinkshoesandbracelets favorited 6 Point Snowflake
31 Jul 03:53
You Will Need
-
 Step 1
Start with a piece of paper. It does not have to be white or your basic 8x11 sheet either; once you know the process you can use any kind of paper you want.
-
 Step 2
Take a corner of the paper and fold it over so that touches the other edge. Make sure the corner where the crease is, is symmetrical as possible.
-
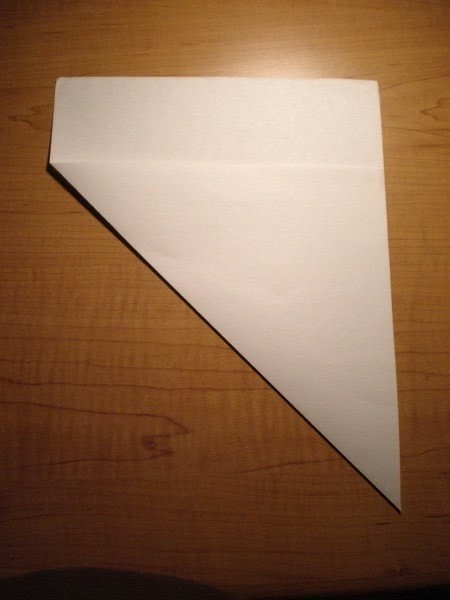
 Step 3
The portion of paper at the top-the excess-is removed leaving a large right triangle of paper. You can use your scissors or simply fold and tear along the line.
-
 Step 4
Take the large triangle and fold in half down the center.
-
 Step 5
Your paper should look like a smaller right triangle now.
-
 Step 6
Take the out side edges and fold them over each other so that all edges are aligned. Instead of looking like a right triangle your paper should look like an isosceles triangle.
-
 Step 7
This is how your paper should look like once you've finished step 6.
-
 Step 8
Cut the excess paper off the top. At this point you can cut your design into the paper to create your snowflake.
-
 Step 9
Once you cut into your paper, this is an example of how it should look. Always be wary of folded edges. Sometimes,especially if you're making smaller snowflakes, the scissors cannot cut the paper without ruining your design. You can op-out the scissors for a cutting knife-x-acto knife blade no. 11-and use a cutting mat to protect your surface
-
 Step 10
Be careful opening your snowflakes, especially if you have an intricate design, as they will be delicate. You can even be resourceful and re-use old office papers or even newsprint in order to create your snowflakes!


Pretend it's like a letter that you would fold in thirds to fit inside a legal-sized envelope. The top two points should cross like in the picture (it doesn't show in the small image, but if you click on it it will expand).
Hope that helps!