


About
Make a Cute Quilled 3D Birthday Card
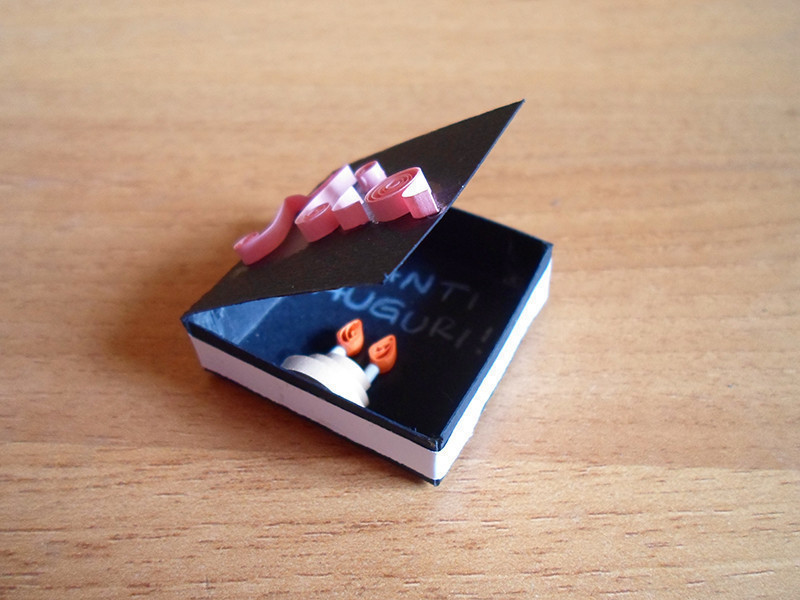
This cute birthday card is a small box with a tiny birthday cake inside and the name of the recipient "written" on the cover. All of them are paper quilled.
It's a great idea for any kind of card and I am sure everybody will love it! It's very simple and fast to make too so...have fun! :)
- Carrie B. added 3D Miniature Card to Gifts 02 May 01:38
-
 Alissa B. favorited 3D Miniature Card
21 Apr 01:23
Alissa B. favorited 3D Miniature Card
21 Apr 01:23
-
 jaisa.riley favorited 3D Miniature Card
19 Apr 17:37
jaisa.riley favorited 3D Miniature Card
19 Apr 17:37
-
 Sarah B. added 3D Miniature Card to Housewares
12 Apr 04:29
Sarah B. added 3D Miniature Card to Housewares
12 Apr 04:29
-
 Autumn L. favorited 3D Miniature Card
10 Apr 22:12
Autumn L. favorited 3D Miniature Card
10 Apr 22:12
-
 Zombie Babe favorited 3D Miniature Card
08 Apr 00:29
Zombie Babe favorited 3D Miniature Card
08 Apr 00:29
-
 kitblu favorited 3D Miniature Card
30 Mar 01:37
kitblu favorited 3D Miniature Card
30 Mar 01:37
-
patricia m. favorited 3D Miniature Card
29 Mar 12:19
-
 WerewolfCas favorited 3D Miniature Card
29 Mar 08:07
WerewolfCas favorited 3D Miniature Card
29 Mar 08:07
-
 lindarose92 published her project 3D Miniature Card
29 Mar 06:00
lindarose92 published her project 3D Miniature Card
29 Mar 06:00
-
 Step 1
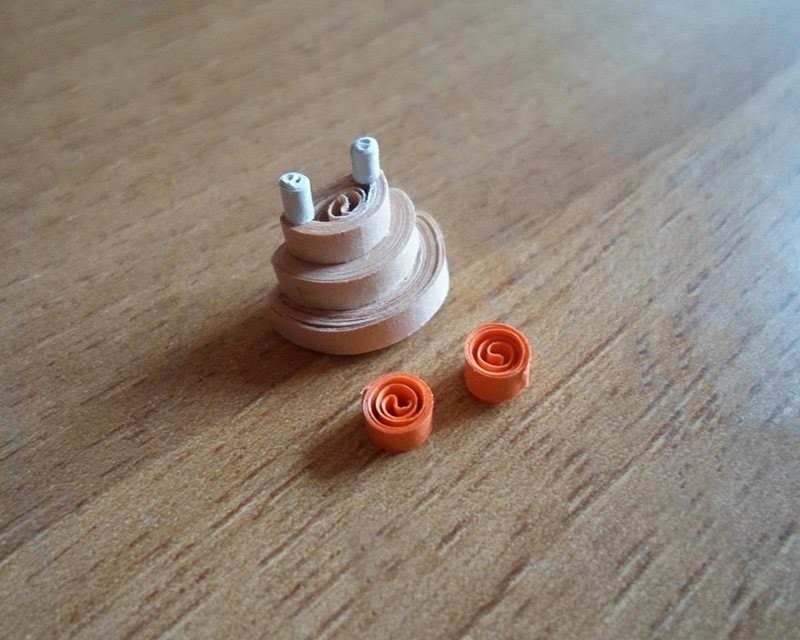
Make a coil inserting the beginning of a paper strip in the quilling tool. Remove it from the tool and let it loose between your fingers. Secure your loose coil with some white glue.
-
 Step 2
Make other 2 smaller coils. All of them must be loose but one smaller than the other.
-
 Step 3
Press them with your fingers to give them a shape that resembles a D. One side needs to be straight and the rest is round.
-
 Step 4
Glue the smallest coil on the medium one, and the medium one on the biggest one. Make sure to align all the straight sides as if it was a stair.
You have just created a cake! -
 Step 5
Create 2 tiny tight coils making 2 or 3 rounds only. Secure them with glue.
-
 Step 6
Glue your tiny coils on top of the cake. These will be the candles.
Now make 2 tiny loose coils in orange. They are made like the previous ones but they are loose instead. -
 Step 7
Press them with your fingers to give them a teardrop shape and glue them on top of the candles.
-
 Step 8
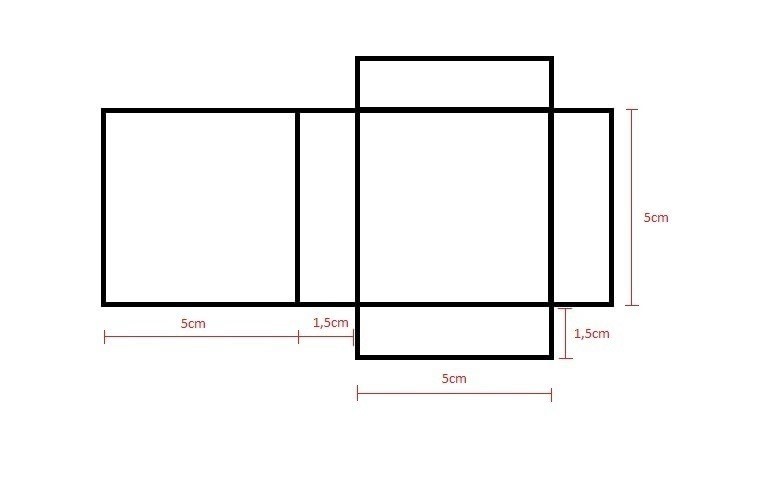
Now draw this scheme on a piece of black (or whatever color you like) card stock.
-
 Step 9
Cut the shape (it will be your box structure).
Fold the square that doesn't have any border around, following the line you traced. -
 Step 10
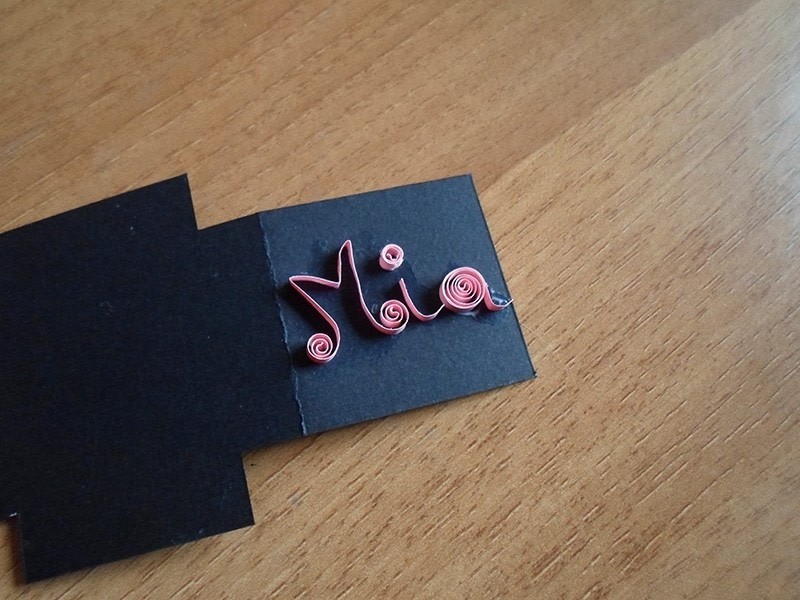
Now shape other paper strips of the color you like with the quilling tool to "write" the name of the card's recipient on the box cover (the square you just folded).
-
 Step 11
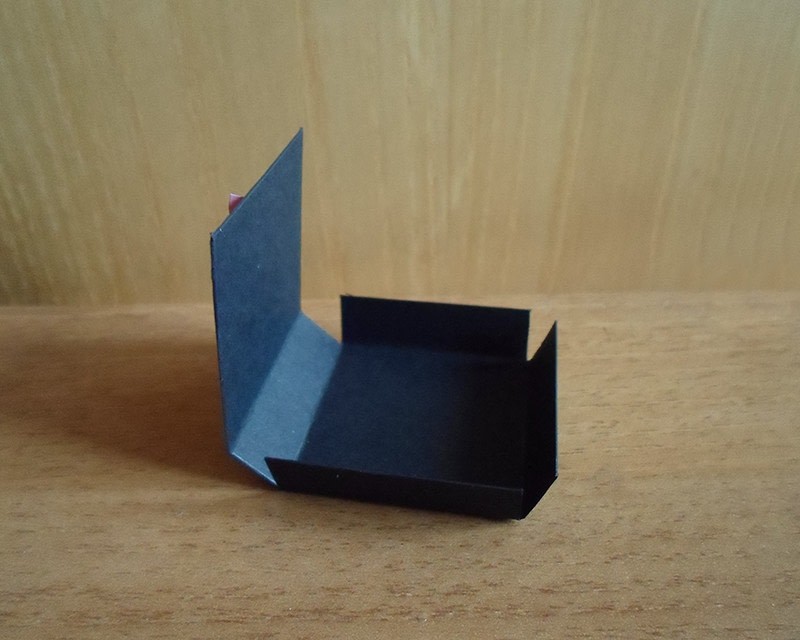
Fold the rest of the box following the lines you drew on the structure. Your box will start to form.
-
 Step 12
Keep the borders of your box together adding little pieces of scotch tape in it.
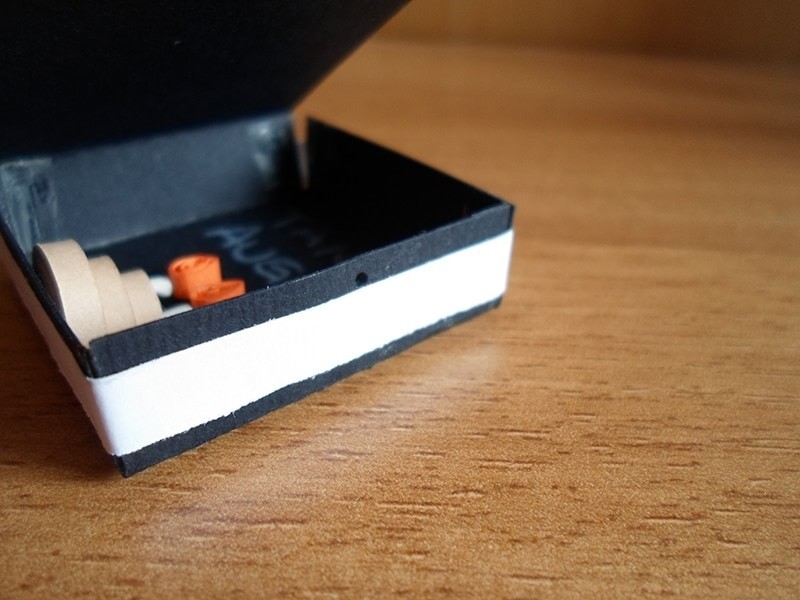
Glue the quilled cake on the lowest border and write a note. -
 Step 13
Glue a paper strip all around the box's borders to keep everything together in a better way and make it nicer.
Then make a tiny hole on the right border of the box and one on the right side of the cover. Make them in the middle. -
 Step 14
Cut a piece of thread, pass it through the holes you have just made and make a bow to close the box.
Your 3D card is done!