


About
Just in time for Summer
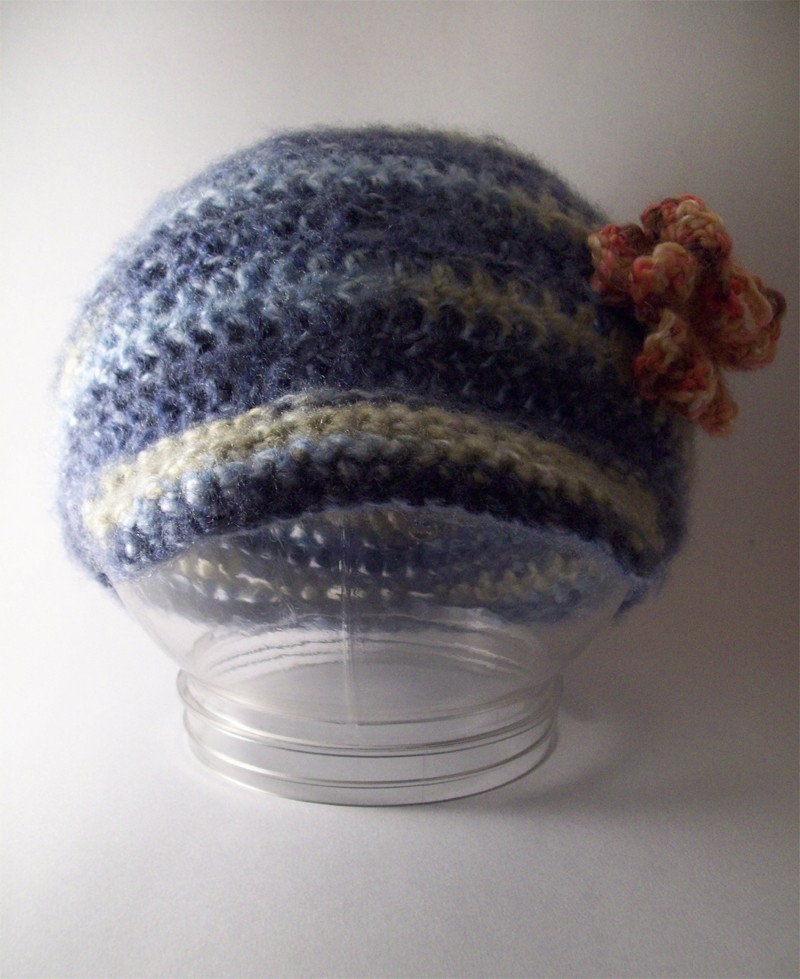
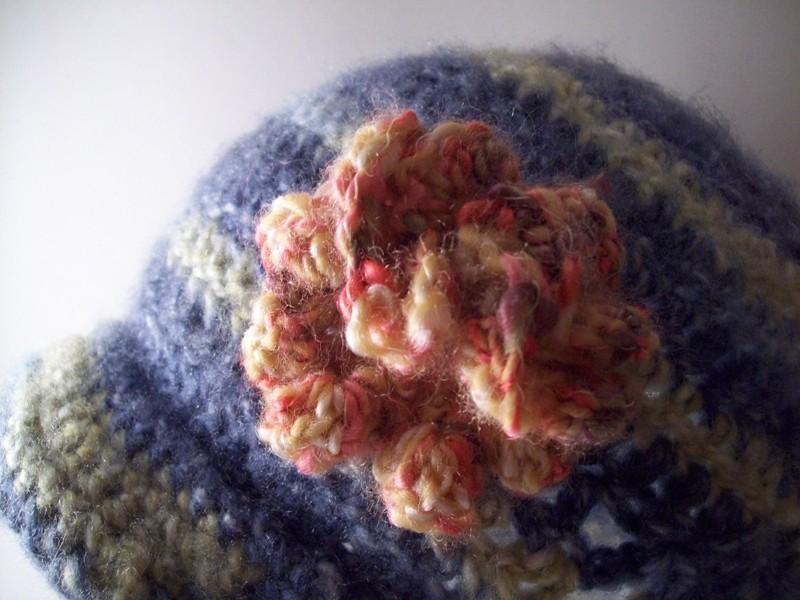
As summer is starting, I decided to try my hand at crocheting some hats. I finished the first sample the other day but wasn't all to happy with the outcome so I tweaked the pattern a bit and added flowers.
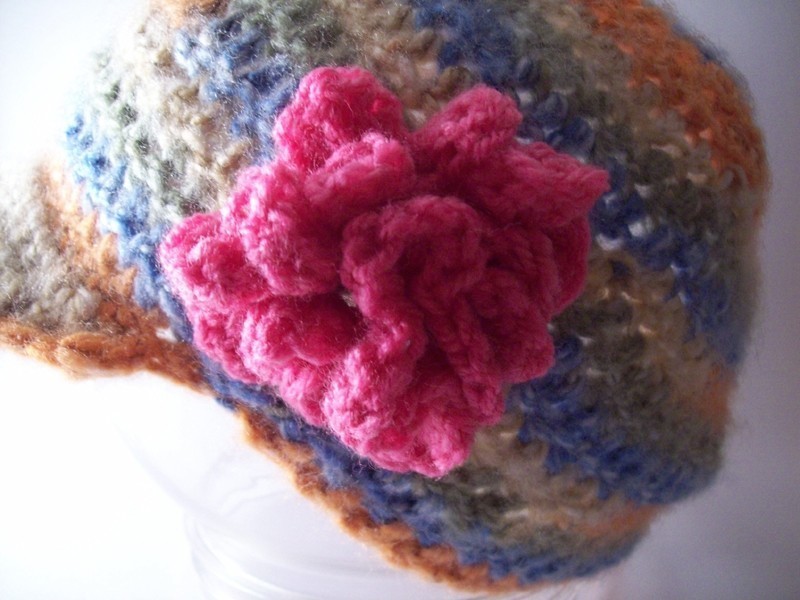
The pink one is for me and the other two are for friends. It took approx. 4 hours per hat, less than a skein and I finished two just today and added the flower to the blue one. I made up a pattern as I went and is fairly easy. I only used double and single crochet stitches and now I am addicted. I still have tons of yarn left over to make tons more but I think I will take a break for a day or two as my hand is aching.
Blue cap: Made with a brushed yarn, 100% Acrylic
Orange: Made with another brushed 100% Acrylic yarn
Pink: Pink Acrylic and wool rich: acrylic, wool, polymide blend
Thanx for looking!
-
 Dale M. favorited 3 Crocheted Hats
09 Mar 16:40
Dale M. favorited 3 Crocheted Hats
09 Mar 16:40
-
 Jenn favorited 3 Crocheted Hats
09 Feb 21:00
Jenn favorited 3 Crocheted Hats
09 Feb 21:00
-
Heidi K. added 3 Crocheted Hats to Odds-n-Ends
03 Oct 00:24
-
 Tess added 3 Crocheted Hats to Crochet
28 Jan 09:17
Tess added 3 Crocheted Hats to Crochet
28 Jan 09:17
-
Tess favorited 3 Crocheted Hats
22 Oct 13:58
-
 Anni favorited 3 Crocheted Hats
29 Jul 15:42
Anni favorited 3 Crocheted Hats
29 Jul 15:42
-
 Step 1
Ch 5 join to form a ring
Rnd. 1: Ch 3 9dc in ring, join
Rnd 2: Ch 2 dc *2dc in ea dc around, join
-
 Step 2
Rnd 3: Ch 2 2dc in next st *dc next, 2dc next. Repeat from * until you are back to the beginning, join
Rnd 4: Ch 2 dc next st, 2 dc in the next *dc next 2, 2 dc in next. Repeat from * until you are back to the beginning, join
Rnd 5: Ch 2 dc next 2 st(s), 2 dc next st * dc next 3, 2 dc next st. Repeat from * until you are back to the beginning, join
Rnd 6: Ch 2 dc next 3 st(s), 2 dc next st * dc next 4, 2 dc next st. Repeat from * until you are back to the beginning, join
Rnd 7: Ch 2 dc next 4, 2 dc next st *dc next 5, 2 dc next st. Repeat from * until you are back to the beginning, join
Rnd 8: Ch 2 dc next 5, 2 dc next st *dc next 6, 2 dc next st. Repeat from * until you are back to the beginning, join
**Rnd 8B: Ch 2 dc next 6, 2 dc next st * dc next 7, 2 dc next st. Repeat from * until you are back to the beginning, join
**Note: only add this round if you are A) using a small thickness yarn and using a j or smaller hook, B) it is too small.Rnd 9-11: Ch 1, dc ea st of each round joining when you get to the end of each round
Rnd 12: Ch 3 sk next st, dc the next * ch 1 dc next 6 st(s), skip next one. Repeat from * until you are back to the beginning, join
***Rnd 13: Ch 3 sk next st, dc the next * ch 1 dc next 5 st(s), skip next one. Repeat from * until you are back to the beginning, join
***Only use this round if you require it to be smaller, otherwise skip this round and move to Rnd 14.Rnd 14-15: Ch 1 dc ea st of each round joining when you get to the end of each round. Fasten off.
-
 Step 3
Brim:
** make sure that you have three stitches at the end of each round, these are for the sc dec next 2 and sc last st(s)Ch 1 dc next 26
Rnd 1: Ch 1 turn. Sc in front loops of the next 25
Rnd 2: Ch 1 turn. Sc dec next 2, sc next 5, 2sc in next, sc next 8, 2 sc in next, sc next 5, sc dec next 2, sc last
Rnd 3: Ch 1 turn. Sc dec next 2, sc next 20, sc dec next 2, sc last
Rnd 4: Ch 1 turn. Sc dec next 2, sc next 4, 2sc next st, sc next 8, 2 sc next, sc next 4, sc dec next 2, sc last
Rnd 5: Ch 1 turn. Sc dec next 2, sc next 18, sc dec next 2, sc last
Rnd 6: Ch 1 turn. Sc dec next 2, sc
next 3, 2sc next, sc next 8, 2 sc next, sc next 3, sc dec next 2, sc last.Fasten Off.
2nd part of brim:
Join yarn in back loop of 1st st of the first part of brim.
Rnd 1: sc back loops of next 25
Rnd 2-6: repeat rnds 2-6 above
To join the brims together:Either fasten off and start a new thread. Starting at one corner and sc all around both brims at the same time, going around cap body. When you reach the same corner of the brim, fasten off.
OR
After Round 6 of the brim, don’t fasten off. Instead, Ch 1 and turn. With the inner brim facing you start going around the brims, sc both brims together. When you are back to where you began finish off. -
 Step 4
Rosette: S (M,L)
Ch 17 (35, 53) join to form a ring. Make sure to leave a long enough tail to be threaded through center to close the ring a bit. [ this is done after you are finished with round 2]
Rnd 1: Ch 1 34 (70, 106) dc in ring, join in first dc.
Rnd 2: Ch 3 (counts as a dc), 5 dc in first st * sc next st, 6 dc in next st Repeat from * until you reach the first st. and sc the st.
Fasten off.
-
 Step 5
Now take the tail in the middle and thread through the center…(so when you get back to where you started, you can pull the thread and it will bring the ring closer together.) now all that is left to do is attach to where you want it to be on the hat and you are finished.
Note: I used a small rosette which came out just the right size.


pj
but what size is the hook you used?
thx for sharing