
Features


 By
Tanis G.
By
Tanis G.

Learn lace knitting in #TechniqueTuesday with Tanis from TanisKnits and then stitch her beecham cowl.
-
 Step 1
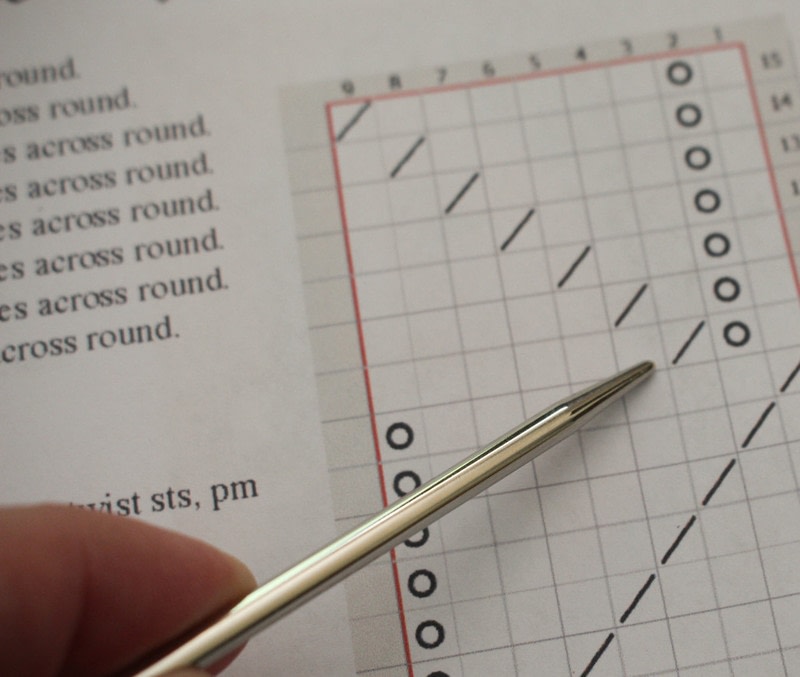
Here we have a swatch of the Beecham Cowl chart knit through round 8.
We know things are coming along nicely because the yarn over's and the k2togs are swooping up in the right direction and our lace pattern is beginning to form properly. -
 Step 2
See how those yarn over's are forming a diagonal and those k2togs are swooping over on the right side? Each round should be an extension of the round before - the pattern should flow with increases and decreases working together to form some sort of design.
If things look choppy or do not flow off of each other, you can tink back your round and try again! That's one of the great things about knitting - if something doesn't look right or you're unhappy with it, take it back and try again. -
 Step 3
We're about to embark upon round 9 and this time we have a yarn over directly next to a k2tog.
-
 Step 4
We bring our yarn to the front for a yarn over, however, normally when we do a k2tog, the yarn is at the back of the work as it always is when we knit.
When a yarn over is followed by a k2tog, we need to leave the yarn to the FRONT, otherwise, the yarn over will not form and you'll not only not get that lace hole, but you'll be short a stitch and your pattern will be off later.
Be certain that the yarn stays in front before starting that k2tog! -
 Step 5
Go directly into your k2tog with the yarn still in the front from that yarn over.
It may feel odd if you haven't done this before, but it'll work out - promise! -
 Step 6
Execute that k2tog and finish off that stitch.
-
 Step 7
Now take a close look at your work - because we had the yarn in the front for that yarn over, then went directly into a k2tog, we've not only formed a hole in our work (which we want), but that k2tog is looking great as well and forming the next swoop.
A yarn over is an INCREASE (+1 stitch) and a k2tog is a DECREASE (-1 stitch). By pairing them together, they cancel each other out (1-1=0) and we keep our stitch count the same at the end of the round.
Make sense? We started with 135 stitches and we'll end with 135 stitches, regardless of all those yarn overs and k2togs. It's important to maintain our stitch count so our cowl doesn't start to grow bigger or get smaller on us. -
 Step 8
Looking good! Onwards!


Got the hang of this technique?
Put your new skill to the test with this tutorial:
Is there a certain technique you'd love to learn or one that you could teach us? Send us a message!
Share
Follow
Comments


