
Features


 By
Cat Morley
By
Cat Morley

Learn how-to cross-stitch in #TechniqueTuesday with Cat Morley and then make her mini cross-stitch figaro necklace!
-
 Step 1
All you'll need to cross-stitch is an embroidery needle, some embroidery floss, scissors and a piece of aida cloth. Cut a length of floss long enough to reach from your extended hand to your shoulder. You can change the thickness of your stitches, by subtracting threads from your floss. I like to pull my thread apart in half and stitch with three threads.
-
 Step 2
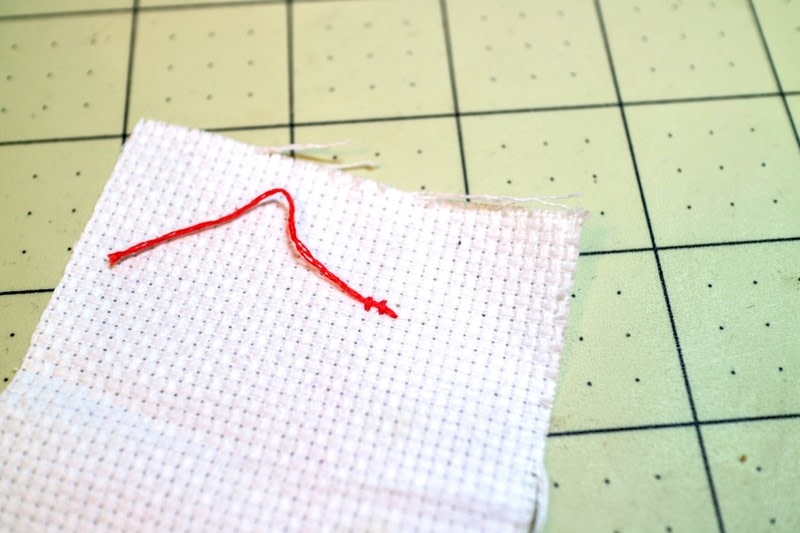
Bring the needle and thread through the back of your cloth to the front, leaving a tail of a few inches at the back of the cloth.
-
 Step 3
Take the needle back down through the cloth, a hole to the right and a hole above the one you came through on, creating a sloping stitch going up to the right.
-
 Step 4
Bring the needle back through to the front, this time in the hole one below the one you went to the back on.
-
 Step 5
Repeat this process to continue your stitches. When you're working from a chart, or creating a design. Stitch one line at a time, going from left to right for the desired number of stitches.
-
 Step 6
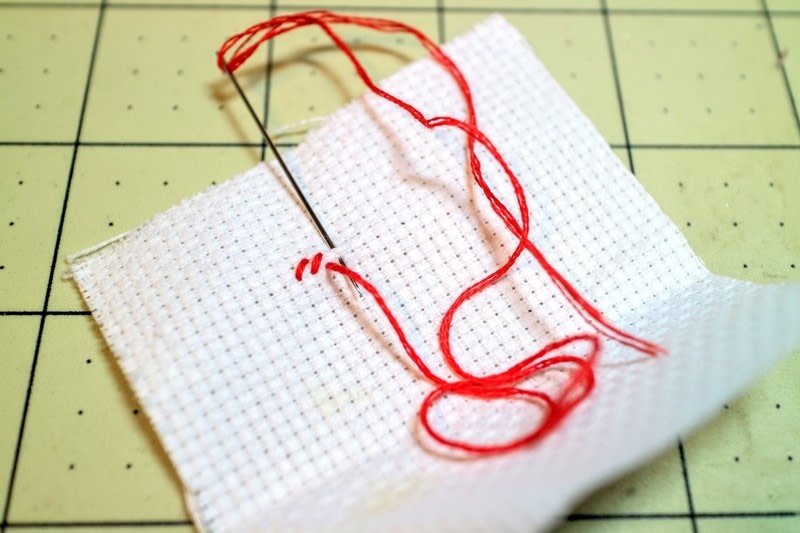
Turn the cloth over to reveal neat vertical stitches at the back. Instead of knotting off your loose tail, slip it through a number of these stitches. This will keep your finished piece flat and neater than knotting.
-
 Step 7
Once you've got the hang of making a basic stitch, you can try making your stitches in just one step by bringing the thread through to the front at the bottom left, then placing the needle through the top right hole and then slipping it through the bottom right hole, before pulling the thread through in one stitch. The keeps your stitching at the front and makes the process a lot faster.
-
 Step 8
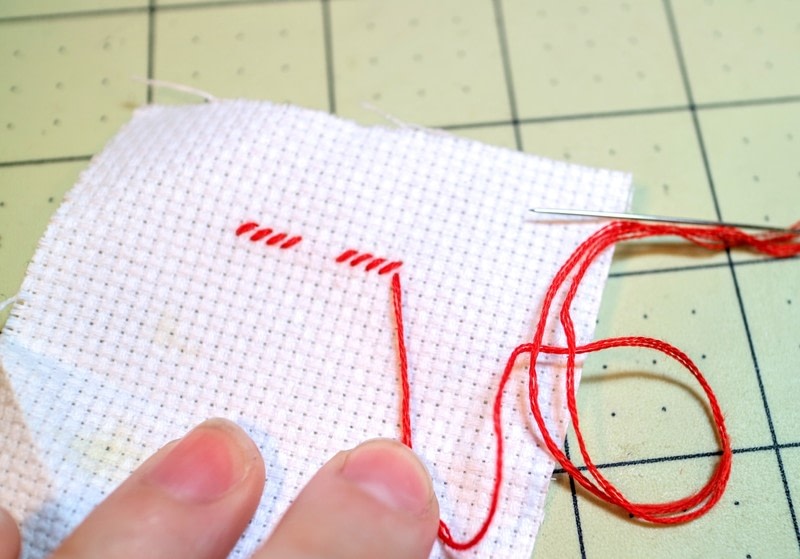
If you need to leave a blank space, or change colour for a stitch on your current line, skip as many holes as you need, bringing the thread back through to the front further along the line where that colour continues.
-
 Step 9
Keep stitching until you reach the end of the line.
-
 Step 10
Bring the thread back through to the front through the bottom right hole.
-
 Step 11
Now, take the thread back down through the top left hole, creating your first x stitch.
-
 Step 12
Continue this process for each stitch you created, working your way back along the line.
-
 Step 13
When you reach the start of your line again, bring your thread through the top left hole to the back of your work.
-
 Step 14
Bring the thread back to the front two holes below to start the second row.
-
 Step 15
Continue stitching your design following your chart.
-
 Step 16
When you've finished all of your stitches, take the thread through to the back, stitch it through the back of a number of the vertical stitches and cut.


Got the hang of this technique?
Put your new skill to the test with this tutorial:
Is there a certain technique you'd love to learn or one that you could teach us? Send us a message!
Share
Follow


