


About
make this pleated coin purse and tackle zippers easily!
A cute little zippered coin purse tutorial with lots of pictures to help you tackle zippers! I hope you like it. :)
-
 marilyn.steckly favorited Pleated Coin Purse Tutorial
21 Apr 02:34
marilyn.steckly favorited Pleated Coin Purse Tutorial
21 Apr 02:34
-
 Alex B. favorited Pleated Coin Purse Tutorial
12 Dec 07:50
Alex B. favorited Pleated Coin Purse Tutorial
12 Dec 07:50
-
 Mitzi B. favorited Pleated Coin Purse Tutorial
15 Jun 23:47
Mitzi B. favorited Pleated Coin Purse Tutorial
15 Jun 23:47
-
 Catherine W. added Pleated Coin Purse Tutorial to bags
07 Mar 19:21
Catherine W. added Pleated Coin Purse Tutorial to bags
07 Mar 19:21
-
 Ana M. favorited Pleated Coin Purse Tutorial
26 Oct 01:39
Ana M. favorited Pleated Coin Purse Tutorial
26 Oct 01:39
-
 Miss Smalls favorited Pleated Coin Purse Tutorial
06 Sep 19:15
Miss Smalls favorited Pleated Coin Purse Tutorial
06 Sep 19:15
-
 Step 1
Step 1: make your pattern (super easy)
For the top of the purse, draw a rectangle 3.5cm (1.5") by 12.5cm (5")
For the purse body, draw a rectangle 7.5cm (3") by 15cm (6"). Round off the bottom corners with a gentle curve.
for the purse lining, draw a squarish shape, 10cm (4") by 12.5cm (5")
Apologies for the dodgy picture, some of it has been cut off!
-
 Step 2
Step 2: cut out your fabric
Pin your pattern pieces to your chosen fabrics and cut out two of each for the front and back of the purse.
I find it easiest to fold the fabric in half with right sides together and cut the two pieces out at once using a rotary cutter. it means that the two pieces should match up properly when you're sewing them together later. -
 Step 3
step 3: add interfacing (optional)
At this point, I used some iron on interfacing on the purse top and body to give my purse some extra stability. These fabrics are fairly light cotton and can be a bit floppy, but if you're using heavier fabric like linen or denim you might not need it.
I make the interfacing pieces smaller than the fabric pieces so it doesn't add bulk to your seams. -
 Step 4
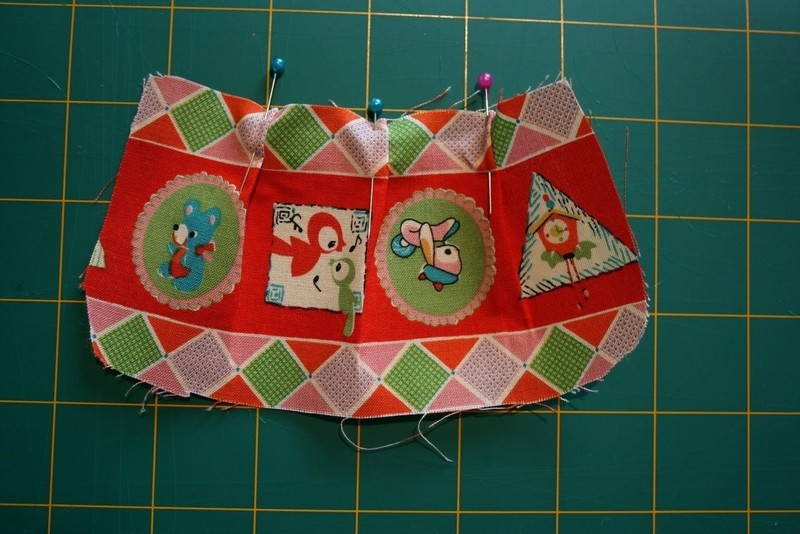
step 4: make pleats
Take your purse body pieces and some pins. You'll notice the purse body is a little longer in length than the purse top. This is to allow for the folds you make in the fabric to create the cute little pleats. After you've made your pleats, these pieces should be the same in length, so keep the pleats pretty small.
To make a pleat, you basically fold the fabric on itself and pin it in place wherever you want to pleat to sit. I have 3 pleats in my purse, all going in the same direction. Experiment with it until you're happy.
Repeat with the other piece.
Important: After making and pinning your pleats, grab one of your purse top pieces and check that its length is the same as the length of the purse body. the purse body will have a little curve in it due to the pleats, but you can stretch it a little to line it up.
-
 Step 5
Step 5: sew across the top of pleats
To hold the pleats in place, give them a little press with your iron and stitch across the top, using a small seam allowance so you don't see the stitches later on. Press again.
-
 Step 6
Step 6: attach purse body to top
Pin the purse top to the purse body and stitch in place. Press flat.
-
 Step 7
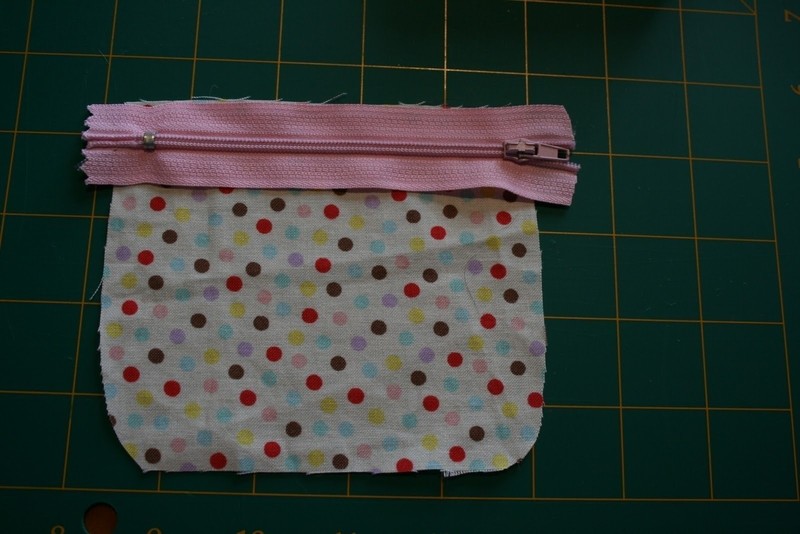
Step 7: cut zipper to size
Cut your zipper to a length a little longer than the length of the purse lining. Cut it from the end with the zipper pull, but be careful not to let the zipper pull come off the end as it's a pain to get back on.
Lay one of your lining pieces face up on the table. Lay the zipper on top, also right side up. the zipper ends should hang over each end of the fabric as pictured below. Don't pin yet.
-
 Step 8
Step 8: line up body and lining fabrics
Lay one of your body pieces face down on top of the zipper and lining piece.
Line up the fabric and zipper tab carefully at the top and pin into place along the length. Don't worry if the curved bottom edges of the body and lining don't match up as you won't be sewing these bits together anyway.
-
 Step 9
Step 9: attach zipper to fabric
Using the zipper foot on your machine, carefully stitch along the length, not too close to the zipper teeth.
Tip: This has made sewing zippers heaps easier for me: Start at the end of the zip with the metal closure and the zip pulled up completely. When you have sewn about 3/4 of the distance, stop with the needle in the fabric, lift the zipper foot off the fabric (the needle will hold it in place) find the zipper pull and carefully slide it up to the other end. this allows you to do the other end of the zipper easily without the pesky pull being in the way.
After sewing, press the fabric so it sits flat against the zipper. You can top stitch too if you like.
-
 Step 10
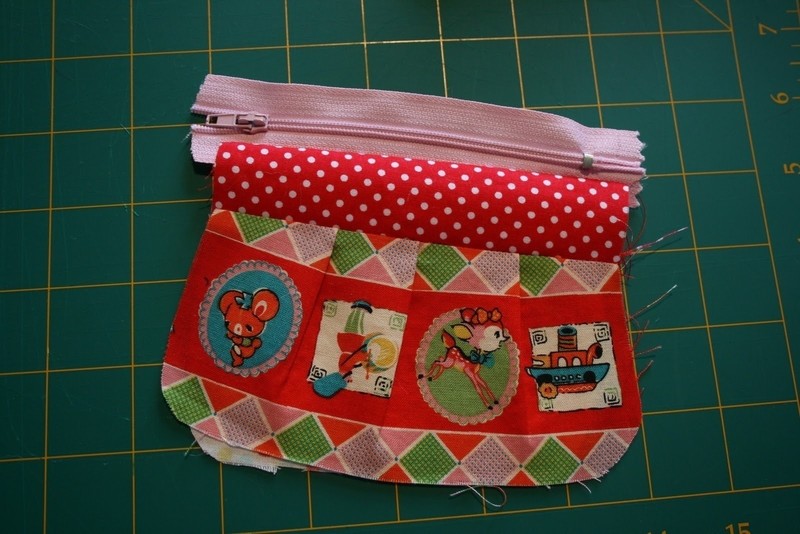
Step 10: repeat on the other side
Lay the lining piece face up, put the zipper on top, right side up. Line it up properly. This pic is just to highlight what it would look like underneath.
-
 Step 11
Step 11: lay body fabric on top
Lay the other body piece on top, pin into place. Both of your outer body pieces should be right sides together as you can see here.
At this stage, I find it easier to open the zipper so the pull is at the opposite end to where you start sewing. you can then use the same tip above to sew the two fabric pieces to this side of the zipper tab.
-
 Step 12
step 12: what you have so far
This isn't a step, just a pic of what you have so far. If you flip it over, you'll see both lining pieces right side facing out.
-
 Step 13
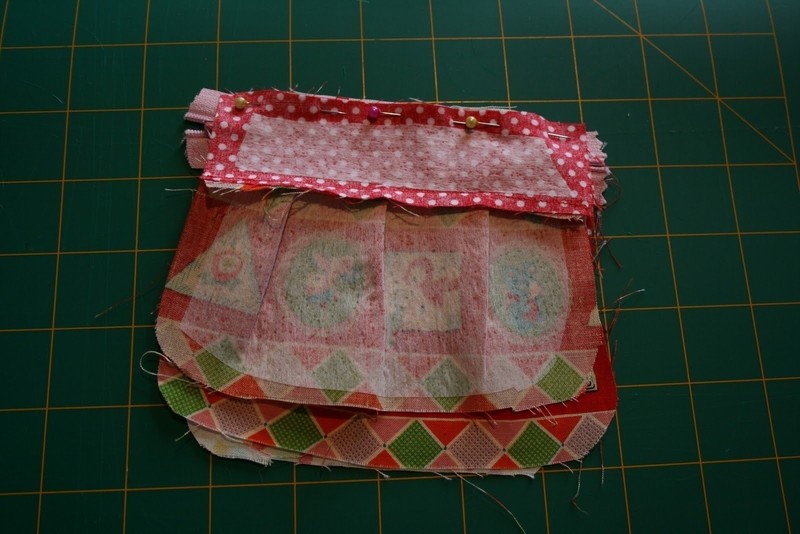
step 13: pin the fabric for sewing
Important: before pinning, pull the zipper across halfway or you won't be able to turn it out the right way.
So now we need to sew the two body pieces and the two lining pieces together.
Pin the two body pieces right sides together.
Pin the two lining pieces right sides together, leaving a gap of about 4 or 5 cm (2") in the bottom so we can pull it through the right way later.
In the picture, the gap is marked with a bobby pin.
In this picture you can see the zipper ends poking out of each end. When you put the lining and body pieces together, the zipper will need to be adjusted so the tabs are sitting flat on top of each other, facing the same direction. It makes it easier to sew them down and it look neater when you turn it the right way.
-
 Step 14
step 14: sew around the perimeter of the purse
Starting next to the gap you have left in the lining, stitch all the way around the perimeter of the purse, carefully going over the zipper ends, and stopping at the gap in the lining at the other end.
Note: Take care when you go over the zipper end with the metal fastener. it will be close to the seam allowance so take care you don't hit it with your machine needle.
-
 Step 15
Step 15, trim seams, pull through
Trim the excess zipper and clip your curves so they sit nicely when pulled through the right way.
Now this is the fun part. Put your hand (or fingers if you made the gap too small eep!) into the gap in the lining and pull the body of the purse through the opening. Keep pulling until it's right side out.
-
 Step 16
Step 16: close the gap and press flat
Use a chopstick to poke out the corners of the zip and the curves of the purse body and lining.
Slipstich closed the gap in the lining and press the whole thing flat.
Hooray! You've made a cute little purse for your coins, lip gloss, mints, Chiuaua..... maybe not.
Now go and make one for your favourite friend!


<3!