About
Veneer + Dye + Electricity = Serious Awesomeness!
I've just discovered how much fun it is to work with wood veneer. It's so flexible, it's like working with heavy paper. And... it's easy to make all kinds of colorful patterns with Rit fabric dye. Super fun!
Then using just your garden-variety, recycled, deli takeout container as the internal structure, a pre-made IKEA lamp assembly and one piece of wood veneer, I made a pretty cool lamp. Actually I made three, but who's counting?
-
 Key West Witch favorited Dyed Wood Veneer Lamp Trio
29 Jun 10:21
Key West Witch favorited Dyed Wood Veneer Lamp Trio
29 Jun 10:21
-
 Maemi.Gojo added Dyed Wood Veneer Lamp Trio to Furniture
02 Jun 07:16
Maemi.Gojo added Dyed Wood Veneer Lamp Trio to Furniture
02 Jun 07:16
-
 nigrummonten favorited Dyed Wood Veneer Lamp Trio
04 Feb 03:08
nigrummonten favorited Dyed Wood Veneer Lamp Trio
04 Feb 03:08
-
 Whimsical Peacock favorited Dyed Wood Veneer Lamp Trio
11 Aug 03:14
Whimsical Peacock favorited Dyed Wood Veneer Lamp Trio
11 Aug 03:14
You Will Need
-
 Step 1
1) OK, math is not my forte but after a few attempts, I figured out a shape for my lampshade that would work with the recycled deli containers. Here's the template. You'll need to enlarge it to 6¾"x18". The line that's ¾" from the right edge will be where the lampshade overlaps to be glued.
-
 Step 2
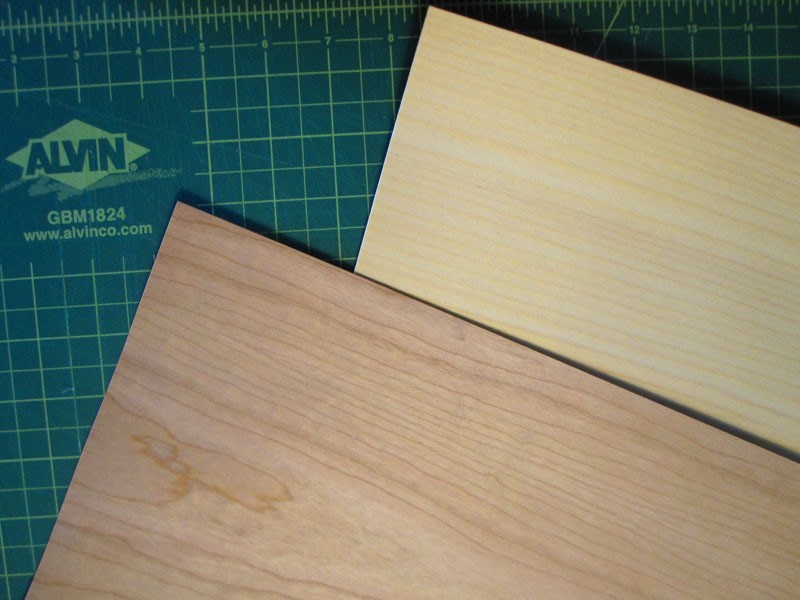
2) The template is simply laid over the veneer, marked and cut out with a scissor or xacto knife. I did three different lamps to test out techniques, the red one is made from cherry veneer and the other two are birch. The cherry was a little dark to work with so I'd say the birch will give you the truest colors. I probably will stick with that in the future.
-
 Step 3
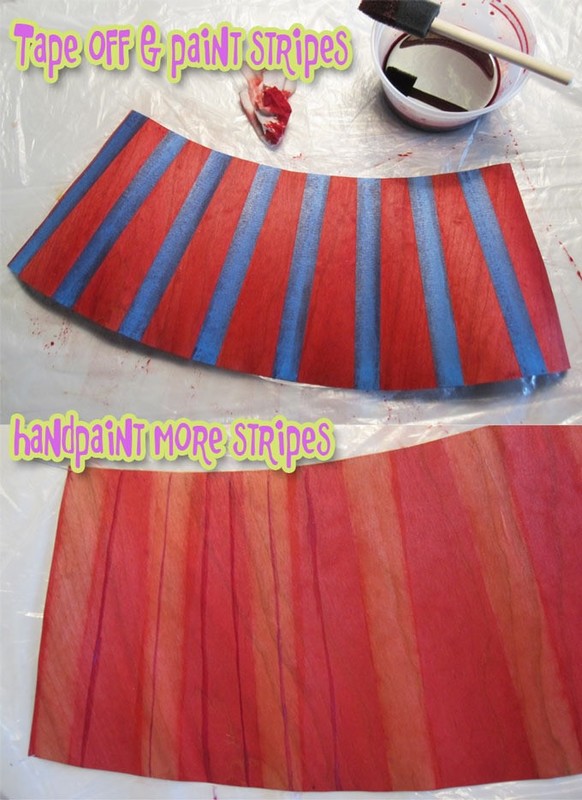
3) On the first lampshade, I taped off a few stripes with masking tape on the cherry veneer. Then grabbing my rubber gloves, I shook up my Rit Cherry Red dye and mixed 2 Tbsp of Rit dye to 1 cup very hot 140Ëš water. Using a 1" foam brush, I dye-painted the stripes. When it was dry, I removed the tape and painted over the entire lampshade with the Rit Petal Pink dye using the same ratio as above. At times the wet veneer would tend to curl. To keep it flat, I would pin the veneer to cardboard until it dried.
For an accent, I mixed a concentrated dye solution of 1 Tbsp of Rit Purple Dye with a splash of hot water and painted a few pinstripes.
Note: It's important that the dye solution is always hot during application. If it starts to cool, simply reheat in the microwave. -
 Step 4
4) The other two lampshades were cut from the birch veneer. On these I just did freehand dye-painting.
#1: For the second lampshade, I started with an overall color. I mixed 2Tbsp of Rit Tangerine Dye with 1 Cup of very hot water and applied the dye with a foam brush and let dry. Then I hand-painted triangle patterns with the concentrated solutions of Rit Tangerine and Cherry Red dyes. (1Tbsp dye to splash of hot water)
#2: For the third lampshade, I also started with an overall color. I mixed 1 Tbsp of each Rit Lemon Yellow and Kelly Green dyes with 1 cup of very hot water and applied the dye with a foam brush and let dry. Then I hand-painted circle patterns with concentrated solutions of Rit Lemon Yellow, Kelly Green and Teal dyes. (1Tbsp dye to splash of hot water)
Note: I noticed that in some areas the dye would tend to bleed and soften the line of the design. In this case, I just took a very small brush and painted a delicate edge line trying not to use much dye. -
Step 5
5) When dry, it's time to seal the dyed veneer. I experimented with Mod Podge applied with a foam brush and even mixed a tiny bit of dye with the Mod Podge to highlight portions of the detail. That seemed to work very well and enhanced the dye colors nicely. I did 2-3 coats of Mod Podge with a light, fine sanding in between coats.
BTW: love the Mod Podge logo! I might have mentioned my crush on all things tangerine n' fuchsia. -
 Step 6
6) Next up, creating the lamp form. I bought these easy, prewired hanging lamp assemblies at IKEA for $4. Big-time Score!! And I found that a half-pint deli container is kinda the perfect shape to create a lamp form. What I did was just cut off the bottom lip with an xacto knife. Then I marked the diameter of the IKEA socket on the top and cut that circle out. This assembly is so easy. Just fit the socket thru the hole in the lamp form, i.e. deli container, and fasten with the plastic ring that comes with the set on the inside of the the lamp. I took these pix as I was test fitting the lamp assembly but actually added the socket assembly AFTER the lampshade was glued to the lamp form. It would have been really awkward glueing with that electrical cord hanging there.
Note: This IKEA lamp assembly is rated for up to 75 watt bulbs but for a small lamp like this, I definitely wouldn't use more than a 40 watt bulb. -
 Step 7
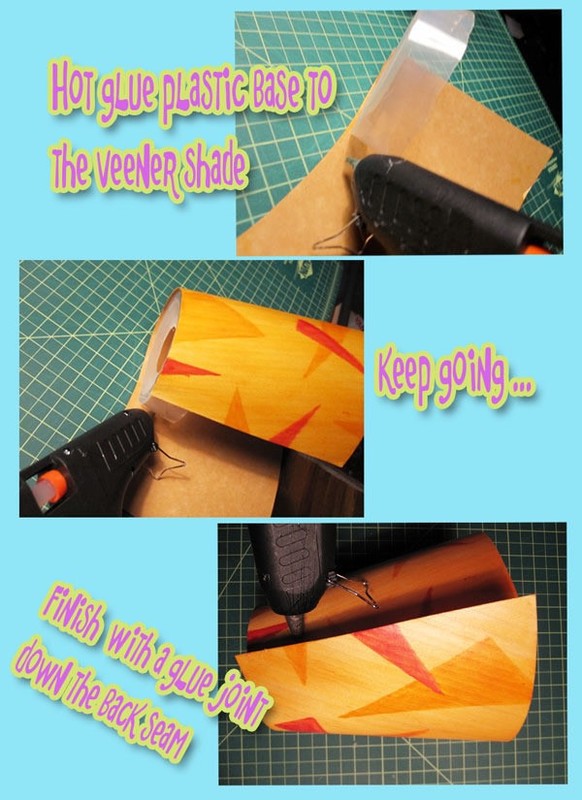
7) To attach the veneer lampshade to the plastic lamp form, I used hot glue. Starting with the top corner of the lampshade, draw a bead of hot glue about 2" long and place along the top of the plastic lamp form. Then working in 2-3" intervals, tack the shade all the way around the form making sure it stays even to the top. Finish off with glue down the side seam.