


About
Turn old magazines, paper or anything in to cute DIY envelopes.
-
 Key West Witch favorited DIY Envelopes
12 May 15:40
Key West Witch favorited DIY Envelopes
12 May 15:40
-
 Anni L. favorited DIY Envelopes
08 May 12:11
Anni L. favorited DIY Envelopes
08 May 12:11
-
 Jacquelyn C. added DIY Envelopes to Got tricks up my sleeve
25 Oct 20:20
Jacquelyn C. added DIY Envelopes to Got tricks up my sleeve
25 Oct 20:20
-
Jacquelyn C. favorited DIY Envelopes
25 Oct 20:19
-
 Teresa S. favorited DIY Envelopes
25 Jan 16:35
Teresa S. favorited DIY Envelopes
25 Jan 16:35
-
 lynn.wagner.501 added DIY Envelopes to My projects
09 Jun 09:05
lynn.wagner.501 added DIY Envelopes to My projects
09 Jun 09:05
-
lynn.wagner.501 favorited DIY Envelopes
09 Jun 09:05
-
 Ilana M. favorited DIY Envelopes
21 Jan 01:10
Ilana M. favorited DIY Envelopes
21 Jan 01:10
-
 yummywakame favorited DIY Envelopes
25 Sep 00:00
yummywakame favorited DIY Envelopes
25 Sep 00:00
-
 Edward M. favorited DIY Envelopes
24 Sep 06:34
Edward M. favorited DIY Envelopes
24 Sep 06:34
-
 Step 1
Start off with an envelope in the size you want, you're going to make a template of this that you can use over again and again.
The great thing about this, is that you can make any size or shape envelope that you want, so you'll always have the right envelope in stock.
-
 Step 2
Fold out the envelope, carefully unsticking it at the edges, don't worry you can re-stick it later.
-
 Step 3
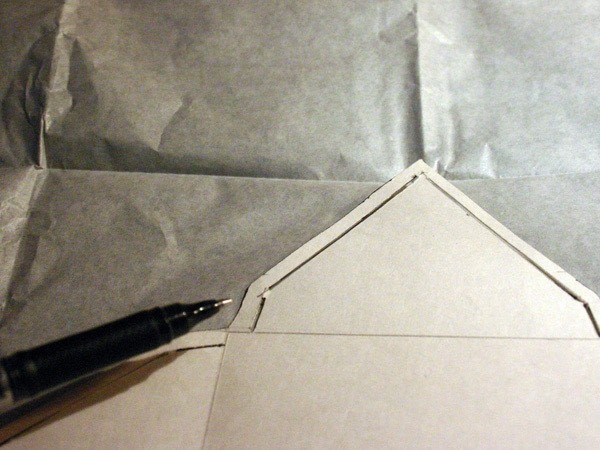
Lay the folded out envelope flat on top of a sheet of heavy card. Trace around the outline with a pencil.
-
 Step 4
Cut out the card envelope shape and then draw a line (with a ruler) between all four corners, so that you get a rectangle in the middle.
-
 Step 5
Use the ruler and a cutting knife to score lightly along these lines.
-
 Step 6
You can now fold your template up in to the envelope shape.
-
 Step 7
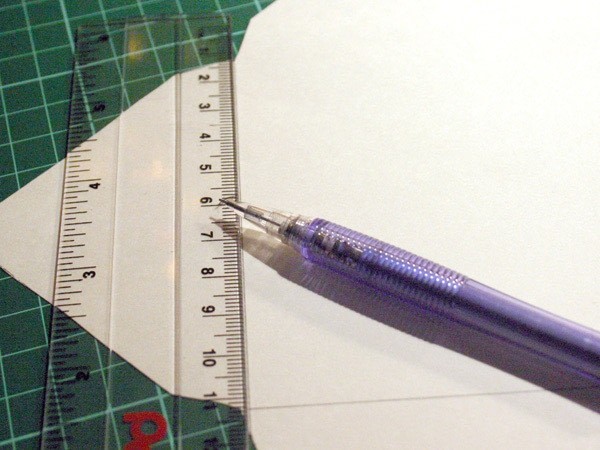
Now take the ruler and measure half a centimeter in from the edge, marking points around the outline.
-
 Step 8
Draw in a second, inner, outline half a centimeter in from the edge.
-
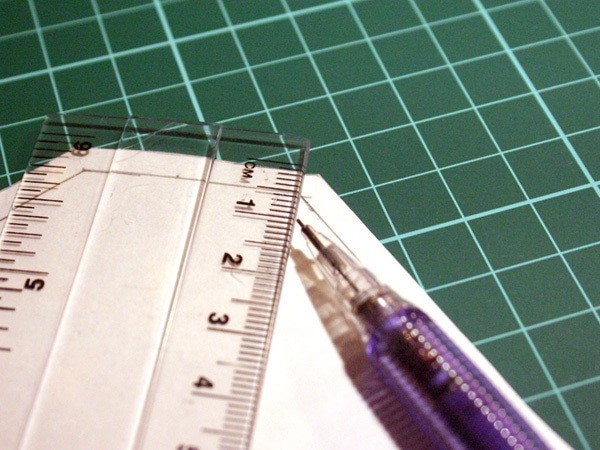
 Step 9
Use the cutting knife, so cut small slits along this template, making sure to leave the edges un-cut (otherwise it will just fall apart).
-
 Step 10
You should now have a template that looks like this.
-
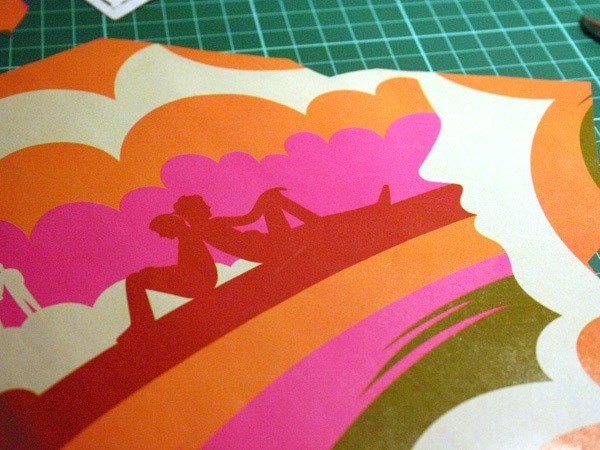
 Step 11
Now comes the fun part. Pick some paper you want to make envelopes out of. You can use magazine pages, wrapping paper or anything you like.
I used an advert for the Zune for the ones shown.
-
 Step 12
Take your template and draw around the outline on to your paper.
-
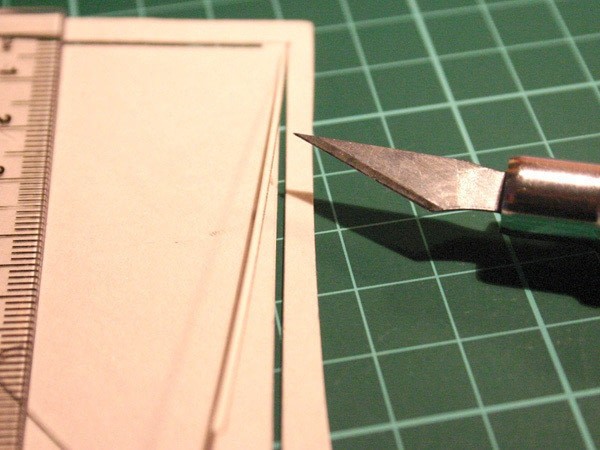
 Step 13
Cut this out and score along the edges like before.
-
 Step 14
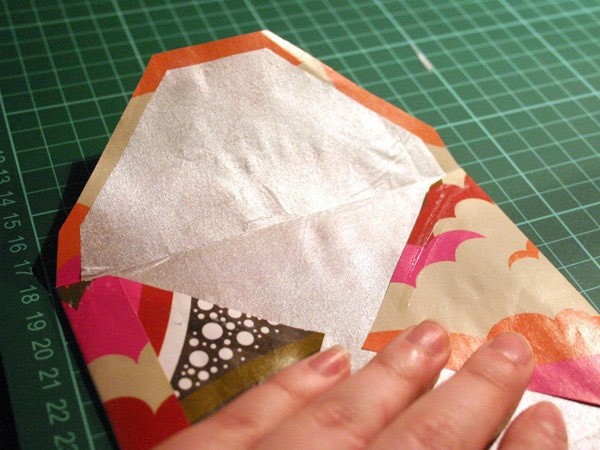
Take some tissue paper and draw along the inner outline on to this.
If you're going to be sending something delicate, you could cut bubble wrap to line your envelope.
-
 Step 15
Cut the tissue paper out and glue on to the envelope, so that the tissue paper will be on the inside of the envelope.
-
 Step 16
Fold the envelope up, glue down the bottom edges of the envelope and you're all done!


Just b/c i get bored. lol
But theyre so pretty! I'll post some soon. ;)